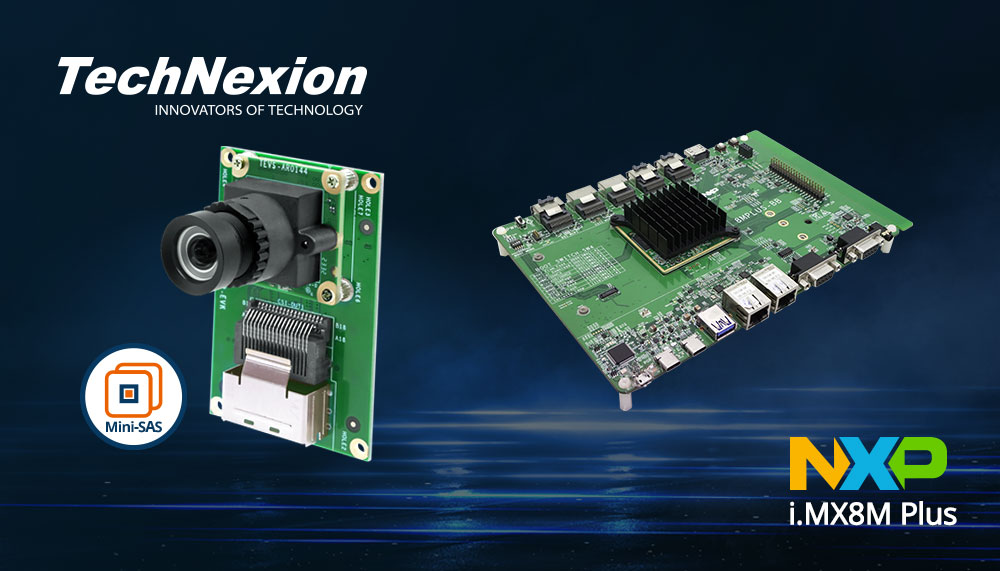
NXP 8MPLUSLPD4-EVK board TEVS Camera Usage Guide
🚀 Introduction
This article guides you how to get started using TechNexion camera modules on NXP 8MPLUSLPD4-EVK board.
📸 Supported Camera Modules
| Camera Series | Products |
|---|---|
| TEVS | TEVS-AR0144 TEVS-AR0145 TEVS-AR0234 TEVS-AR0521 TEVS-AR0522 TEVS-AR0821 TEVS-AR0822 TEVS-AR1335 |
TEVI-OV5640 and TEVI-AR Series Cameras are deprecated starting from Yocto 4.2
Support for TEVI-OV5640 and TEVI-AR Series Cameras is available only up to Yocto 4.0.
If you need to use these camera modules, please refer to the 🔗 Yocto 4.0 (Kirkstone) 2024Q1 Release.
🔧 Hardware Setup Instructions
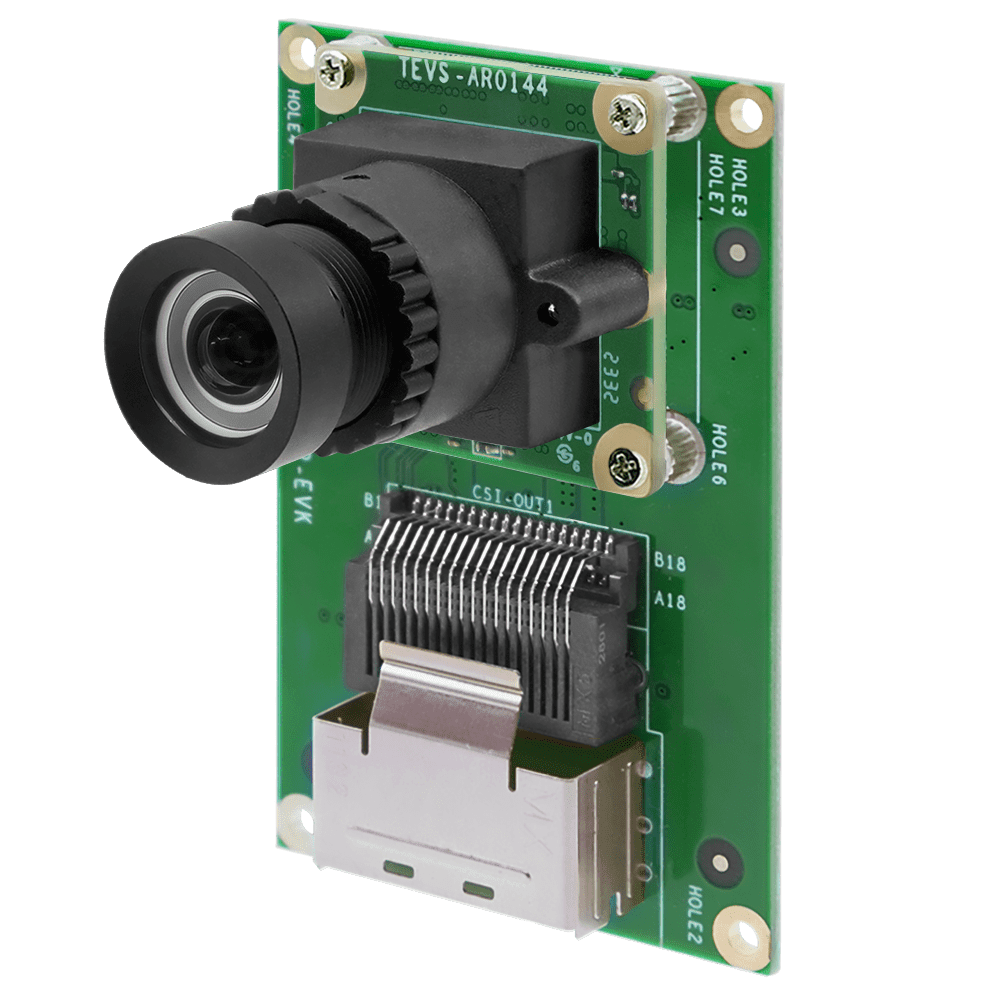
Connect the Adapter Board and Camera Cable
To set up TechNexion camera, connect the adapter board and camera cable to the MIPI CSI1 port on the EVK board.
MIPI CSI2 is disabled by default.
CSI1 and CSI2 share the same reset pin(CSI_RST), so the EVK board can't run both cameras at the same time.
MIPI CSI2 uses the ISI1 video channel, which only supports up to 2K resolution.
Want to use MIPI CSI2? You’ll need to manually update the device tree.
If you're moving to mass production, we suggest switching to the 🔗 WB-EDM-G-IMX8M-PLUS platform.
It’s more compact and better suited for custom applications.
🧰 Camera Installation Instructions
Method 1 - Using TechNexion Pre-built image
Prepare Yocto demo image for testing TechNexion camera
To test TechNexion TEVS Series cameras, you need a demo image that includes the required Device Tree Blobs (DTBs) and camera drivers.
Download and Select the Correct Image for Your EVK
There are two kinds of DRAM types for i.mx8mp evk boards: it's equipped with DDR4 or LPDDR4.
Prebuilt demo images can be available for download via TechNexion's server.
Download Link:
🔗 Supported Release List (Instructions for IMX8MP-DDR4)
🔗 Supported Release List (Instructions for IMX8MP-LPDDR4)
Flashing the Image
You can flash the image to an SD Card using the following methods:
Make sure your EVK board is set to boot from SD card.
Refer to the official NXP guide 🔗 Getting Started with the i.MX 8M Plus EVK
- For Windows Users
- For Linux Users
Use balenaEtcher to write the image to your SD card:
🔗 ![]()
Use bmap-tools for a fast and reliable flashing process to the SD card:
sudo apt-get update
sudo apt-get install bmap-tools
Method 2 - Build Yocto image with TechNexion BSP
TechNexion supports building a Yocto-based Linux image tailored for camera modules using the following kernel and branch.
If you are using prebuilt demo image, you can skip this section. Please refer to 📸 Camera Testing Instructions section for camera testing steps.
Supported Linux Kernel
| Linux Kernel Version | Yocto Branch |
|---|---|
| 6.6.52 | tn-imx_6.6.52_2.2.0-stable |
Source and Build Instructions
🔗 Fetch Yocto source
📖 Build Yocto (Instructions for NXP i.MX 8M Plus EVK)
Method 3 - Build Linux kernel with TechNexion source code
Clone the Kernel Source
Fetch and compile Linux kernel.
- Host OS: Ubuntu 18.04/20.04
- Toolchain:
gcc-linaro-6.4.1-2017.11-x86_64_aarch64-linux-gnu
# For Kernel 6.6.52
$ git clone https://github.com/TechNexion/linux-tn-imx.git -b tn-imx_6.6.52_2.2.0-stable
Set cross-compile environment & the kernel config:
$ export PATH=$PATH:/opt/gcc-linaro-6.4.1-2017.11-x86_64_aarch64-linux-gnu/bin
$ export ARCH=arm64
$ export CROSS_COMPILE=/opt/gcc-linaro-6.4.1-2017.11-x86_64_aarch64-linux-gnu/bin/aarch64-linux-gnu-
$ cd linux-tn-imx
~/linux-tn-imx$ make imx_v8_defconfig
Compile the kernel & module driver:
# compile kernel
~/linux-tn-imx$ make
# create kernel module folder
~/linux-tn-imx$ mkdir -p ./modules
# compile module driver
~/linux-tn-imx$ rm -rf ./modules/*
~/linux-tn-imx$ make INSTALL_MOD_PATH=./modules modules_install
Change kernel Image, DTB & modules:
~/linux-tn-imx/$ cp arch/arm64/boot/Image  <mount_folder>/boot/Image
~/linux-tn-imx/$ cp arch/arm64/boot/dts/freescale/imx8mp-evk-tevs.dtb  <mount_folder>/boot/
~/linux-tn-imx/$ sudo cp -r ./modules/lib/modules/*  <mount_folder>/root/lib/modules/
Method 4 - Build user's Linux kernel with camera driver
-
Download the camera driver and device tree blobs.
$ git clone https://github.com/TechNexion-Vision/nxp_evk_camera.git -b tn-imx_6.6.52_2.2.0-stable -
Copy to your kernel source code.
$ cd nxp_evk_camera/
~/nxp_evk_camera$ cp -r driver/media/i2c/tevs/ <fetch_kernel_folder>/driver/media/i2c/

~/nxp_evk_camera$ cp arch/arm64/boot/dts/freescale/imx8mp-evk-tevs.dts <fetch_kernel_folder>/arch/arm64/boot/dts/freescale/ -
Modify makefile to add driver.
$ cd <fetch_kernel_folder>/driver/media/i2c/
~/<fetch_kernel_folder>/driver/media/i2c/$ vi Makefile
Add this line in Makefile.
obj-$(CONFIG_VIDEO_TEVS) += tevs/
you can refer to linux-tn-imx/drivers/media/i2c/Makefile
-
Modify Kconfig to add camera config.
~/<fetch_kernel_folder>/driver/media/i2c/$ vi KconfigAdd this part under "Camera sensor devices" menu in Kconfig.
config VIDEO_TEVS
  tristate "TechNexion TEVS sensor support"
  depends on OF
  depends on GPIOLIB && I2C && VIDEO_V4L2_SUBDEV_API
  depends on MEDIA_CAMERA_SUPPORT
  select V4L2_FWNODE
  default y
  help
    This is a Video4Linux2 sensor driver for the TechNexion
    TEVS camera sensor with a MIPI CSI-2 interface.
you can refer to linux-tn-imx/drivers/media/i2c/Kconfig
-
Modify makefile to add device tree.
$ cd <fetch_kernel_folder>/arch/arm64/boot/dts/freescale/
~/<fatch_kernel_folder>/arch/arm64/boot/dts/freescale/$ vi Makefile
Add this line in Makefile.
dtb-$(CONFIG_ARCH_MXC) += imx8mp-evk-tevs.dtb
you can refer to linux-tn-imx/arch/arm64/boot/dts/freescale/Makefile
-
Compile the kernel & module driver.
Finally, you can start compiling your new Image files, then copy and replace the Image files in the SD card.
📸 Camera Testing Instructions
Specify Camera DTBO in U-Boot
Manual DTBO Setup
-
Connect the debug console cable to the baseboard (via UART/USB).
-
Power on the board and interrupt the boot process. Keep pressing
Enterwhen the following message appears:Hit any key to stop autoboot: -
Specify the appropriate device tree for your camera using the
fdtfileenvironment variable in U-Boot:
u-boot=> setenv fdtfile imx8mp-evk-tevs.dtb
- Save and continue the boot process:
u-boot=> saveenv
u-boot=> boot
🎥 Start Camera Video Stream via GStreamer
Check Camera Availability
Use the v4l2-ctl tool to list connected video devices.
$ v4l2-ctl --list-device
Example output:
mxc-isi-cap (platform:32e00000.isi:cap_devic):

/dev/video{X}
The following is example.

Launch GStreamer Pipeline
Replace {X}, <res_w> and <res_h> with your capture device number and desired resolution:
$ gst-launch-1.0 v4l2src device=/dev/video{X} ! \
  video/x-raw,width=<x>,height=<y> ! waylandsink
🚨 Troubleshooting
Boot up NXP 8MPLUSLPD4-EVK and check initialization of TEVS driver. If it shows below messages, the driver is initialized correcly.
$ dmesg -t | grep tevs

  tevs 1-0048: tevs_probe() device node: tevs@48
  tevs 1-0048: Version:24.1.1.3
  tevs 1-0048: Product:TEVS-AR0234, HeaderVer:3, MIPI_Rate:800
  tevs 1-0048: probe success
Ensure camera device tree blob(DTB) is specified correctly.
$ dmesg -t | grep -i model
  Machine model: NXP i.MX8MPlus EVK board with TechNexion TEVS camera