TechNexion TEVS Camera for Raspberry Pi 5
Introduction
TechNexion Embedded Vision Solutions provide embedded system developers access to high-performance, industrial-grade camera solutions to accelerate their time to market for embedded vision projects.
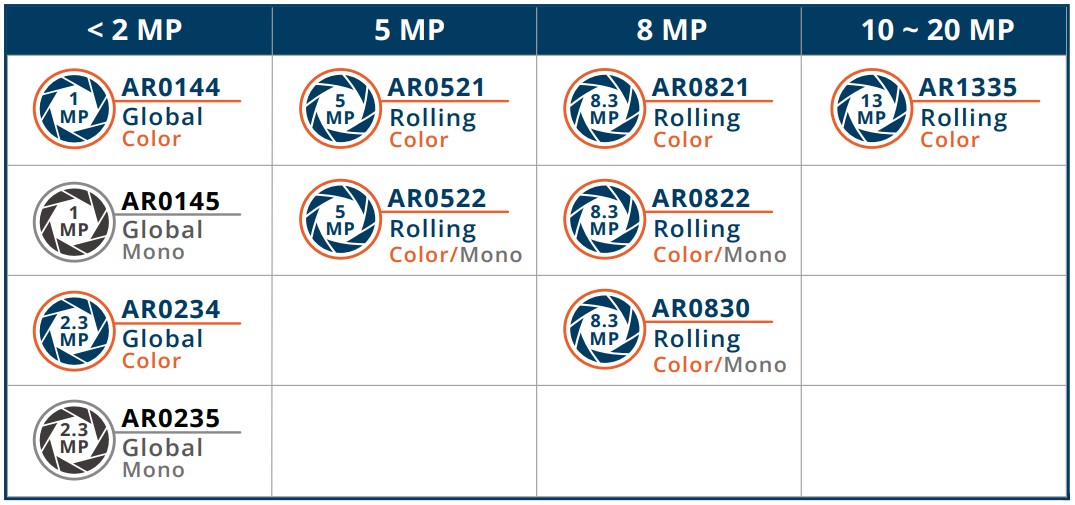
Support Camera Modules
- TEVS Series
- TEVM Series
| Camera Series | Products |
|---|---|
| TEVS | TEVS-AR0144 TEVS-AR0145 TEVS-AR0234 TEVS-AR0235 TEVS-AR0246 TEVS-AR0521 TEVS-AR0522 TEVS-AR0544 TEVS-AR0821 TEVS-AR0822 TEVS-AR0830 TEVS-AR1335 TEVS-AR2020 |
| Camera Series | Products |
|---|---|
| TEVM | TEVM-AR0144 TEVM-AR0145 TEVM-AR0234 TEVM-AR0235 TEVM-AR0246 TEVM-AR0521 TEVM-AR0522 TEVM-AR0544 TEVM-AR0821 TEVM-AR0822 TEVM-AR0830 TEVM-AR1335 TEVM-AR2020 |
Check here ! 🔗 TechNexion Embedded Vision Solutions
Find out the solution which can accelerate your time to market for embedded vision projects.
Supported Raspberry Pi
Support System Version
- Raspberry Pi OS (64-bit) 2024-11-19 [kernel 6.6.y]
- Raspberry Pi OS (64-bit) 2026-04-21 [kernel 6.12.y]
- Raspberry Pi OS (64-bit) 2026-06-18 [kernel 6.18.y]
Install TN Camera on Raspberry Pi
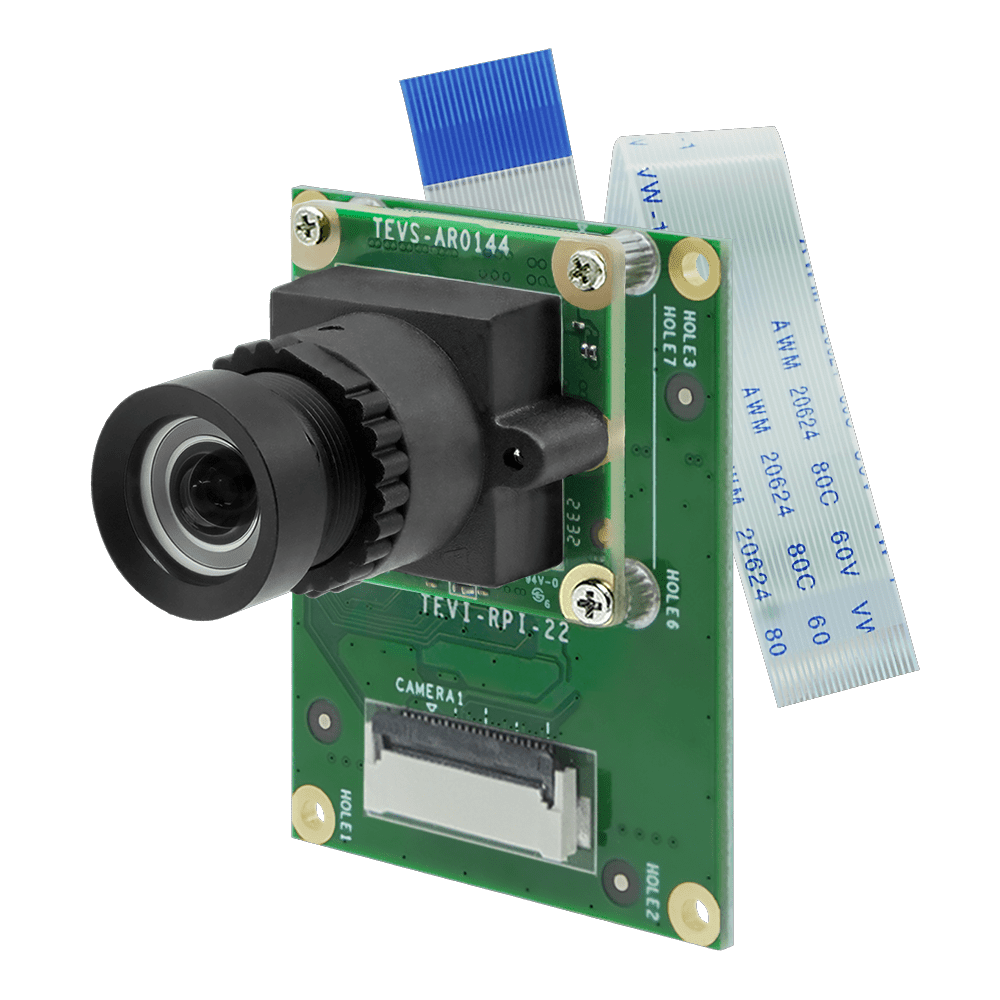
Adaptor for Raspberry Pi Camera
TEVS-RPI22 Adapter for TEVS
Connect TEVS camera and TEVS-RPI22 adapter to Raspberry Pi 5 - "CAM/DISP 0" or Raspberry Pi 5 - "CAM/DISP 1" directly.
Method 1 - Using Technexion Pre-built modules
-
For kernel 6.6.y
The TechNexion pre-built modules is built for kernel version 6.6.51+rpt-rpi-2712. The latest version on RPI GitHub for kernel 6.6.y is kernel version 6.6.78. -
For kernel 6.12.y
The TechNexion pre-built modules is built for kernel version 6.12.75+rpt-rpi-2712. The latest version on RPI GitHub for kernel 6.12.y is kernel version 6.12.93. -
For kernel 6.18.y
The TechNexion pre-built modules is built for kernel version 6.18.34+rpt-rpi-2712. The latest version on RPI GitHub for kernel 6.18.y is kernel version 6.18.36.
They are incompatible. If you want to use the latest version of kernel, you must follow Method 2 to build the camera driver modules.
-
Use Raspberry Pi Imager to create an SD card containing the official image.
- For kernel 6.6.y - "Raspberry Pi OS (64-bit) 2024-11-19 [kernel 6.6.y]"
- For kernel 6.12.y - "Raspberry Pi OS (64-bit) 2026-04-21 [kernel 6.12.y]"
- For kernel 6.18.y - "Raspberry Pi OS (64-bit) 2026-06-18 [kernel 6.18.y]"
-
Boot RPI5 with SD card.
-
Download pre-built modules.
For Raspberry Pi OS (64-bit) 2024-11-19 [kernel 6.6.y]
$ wget https://download.technexion.com/demo_software/EVK/RPI/RPI5/pre-built-modules/latest/tn_camera_module_rpi5_6.6.y.tar.gzFor Raspberry Pi OS (64-bit) 2026-04-21 [kernel 6.12.y]
$ wget https://download.technexion.com/demo_software/EVK/RPI/RPI5/pre-built-modules/latest/tn_camera_module_rpi5_6.12.y.tar.gzFor Raspberry Pi OS (64-bit) 2026-06-18 [kernel 6.18.y]
$ wget https://download.technexion.com/demo_software/EVK/RPI/RPI5/pre-built-modules/latest/tn_camera_module_rpi5_6.18.y.tar.gz -
Uncompress the modules.
For Raspberry Pi OS (64-bit) 2024-11-19 [kernel 6.6.y]
$ tar -xf tn_camera_module_rpi5_6.6.y.tar.gzFor Raspberry Pi OS (64-bit) 2026-04-21 [kernel 6.12.y]
$ tar -xf tn_camera_module_rpi5_6.12.y.tar.gzFor Raspberry Pi OS (64-bit) 2026-06-18 [kernel 6.18.y]
$ tar -xf tn_camera_module_rpi5_6.18.y.tar.gz -
Run installation script.
For Raspberry Pi OS (64-bit) 2024-11-19 [kernel 6.6.y]
$ cd tn_camera_module_rpi5_6.6.y/
$ sh tn_install.sh
****** TechNexion Camera Driver Installation ******
This installation is easy to install TechnNexion Camera Drivers for Raspberry Pi 5.
Before start to install camera driver, You should BACKUP your image and config
to avoid any file you lost while installing process.
Do you want to continue?[Y/n]y
Continuing with the installation...
Install TN-CAM modules: tevs.ko.xz
Installed TN-CAM module file Done.
Install TN-CAM DTBO file: tevs-rpi22.dtbo
Installed TN-CAM DTBO file Done.
Install TN-CAM DTBO file: tevm-rpi22.dtbo
Installed TN-CAM DTBO file Done.
Add TN-CAM Configuration for modules: tevs-rpi22
Add TN-CAM Configuration for modules: tevs-rpi22,cam0
Finish Camera Driver Installation. Return Code:[0]
You should Reboot Device to enable TEVS Cameras.
Do you want to reboot now?[Y/n]y
Rebooting....
For Raspberry Pi OS (64-bit) 2026-04-21 [kernel 6.12.y]
$ cd tn_camera_module_rpi5_6.12.y/
$ sh tn_install.sh
****** TechNexion Camera Driver Installation ******
This installation is easy to install TechnNexion Camera Drivers for Raspberry Pi 5.
Before start to install camera driver, You should BACKUP your image and config
to avoid any file you lost while installing process.
Do you want to continue?[Y/n]y
Continuing with the installation...
Install TN-CAM modules: tevs.ko.xz
Installed TN-CAM module file Done.
Install TN-CAM DTBO file: tevs-rpi22.dtbo
Installed TN-CAM DTBO file Done.
Install TN-CAM DTBO file: tevm-rpi22.dtbo
Installed TN-CAM DTBO file Done.
Add TN-CAM Configuration for modules: tevs-rpi22
Add TN-CAM Configuration for modules: tevs-rpi22,cam0
Finish Camera Driver Installation. Return Code:[0]
You should Reboot Device to enable TEVS Cameras.
Do you want to reboot now?[Y/n]y
Rebooting....
For Raspberry Pi OS (64-bit) 2026-06-18 [kernel 6.18.y]
$ cd tn_camera_module_rpi5_6.18.y/
$ sh tn_install.sh
****** TechNexion Camera Driver Installation ******
This installation is easy to install TechnNexion Camera Drivers for Raspberry Pi 5.
Before start to install camera driver, You should BACKUP your image and config
to avoid any file you lost while installing process.
Do you want to continue?[Y/n]y
Continuing with the installation...
Install TN-CAM modules: tevs.ko.xz
Installed TN-CAM module file Done.
Install TN-CAM DTBO file: tevs-rpi22.dtbo
Installed TN-CAM DTBO file Done.
Install TN-CAM DTBO file: tevm-rpi22.dtbo
Installed TN-CAM DTBO file Done.
Add TN-CAM Configuration for modules: tevs-rpi22
Add TN-CAM Configuration for modules: tevs-rpi22,cam0
Finish Camera Driver Installation. Return Code:[0]
You should Reboot Device to enable TEVS Cameras.
Do you want to reboot now?[Y/n]y
Rebooting....
Method 2 - Build drivers from source code (cross-compiling)
-
You can reference Raspberrypi Documentation - Building the kernel.
-
Make sure the dependencies are installed.
$ sudo apt install -y git bc bison flex libssl-dev make libc6-dev libncurses5-dev

# Install the 64-bit toolchain for a 64-bit kernel
$ sudo apt install -y crossbuild-essential-arm64 -
Get the kernel sources ("kernel version" is 6.6 or 6.12 or 6.18)
# raspberrypi linux kerbel
$ git clone --depth=1 -b rpi-<kernel version>.y https://github.com/raspberrypi/linux

# technexion rpi camera driver
$ git clone --depth=1 -b tn_rpi_kernel-<kernel version> https://github.com/TechNexion-Vision/tn-rpi-camera-driver.git -
Copy TN rpi camera driver to raspberrypi linux kernel.
$ cp -rv tn-rpi-camera-driver/drivers/media/i2c/* linux/drivers/media/i2c/
$ cp -rv tn-rpi-camera-driver/arch/arm64/boot/dts/overlays/* linux/arch/arm64/boot/dts/overlays/ -
Build sources.
Setup RPI5 default configuration.
$ cd linux
$ export KERNEL=kernel_2712

# default configuration
$ make distclean
$ make ARCH=arm64 CROSS_COMPILE=aarch64-linux-gnu- bcm2712_defconfig
Configuring TechNexion TEVS camera.
# config camera
$ make ARCH=arm64 CROSS_COMPILE=aarch64-linux-gnu- menuconfig
# -> Device Drivers
#   -> Multimedia support
#     -> Media ancillary drivers
#       -> Camera sensor devices
#         -> TechNexion TEVS sensor support
#            Set "VIDEO_TEVS" to module,
#            Press "m", save to original name (.config) and exit
Building kernel image, modules and device tree.
# build kernel
$ mkdir -p modules
$ export MODULE_PATH=./modules
$ make ARCH=arm64 CROSS_COMPILE=aarch64-linux-gnu- LOCALVERSION="-tn-raspi" -j$(nproc) Image.gz modules dtbs
$ sudo make ARCH=arm64 CROSS_COMPILE=aarch64-linux-gnu- INSTALL_MOD_PATH=$MODULE_PATH modules_install -
Insert the SD card with the corresponding system pre-programmed into the PC.
- For kernel 6.6.y - "Raspberry Pi OS (64-bit) 2024-11-19 [kernel 6.6.y]"
- For kernel 6.12.y - "Raspberry Pi OS (64-bit) 2026-04-21 [kernel 6.12.y]"
- For kernel 6.18.y - "Raspberry Pi OS (64-bit) 2026-06-18 [kernel 6.18.y]"
-
Install onto the SD card.
# check sd card block device (here we take "sdb" as an example)
$ lsblk
> sdb                         8:16   1  29.7G  0 disk
  ├─sdb1                      8:17   1   512M  0 part /media/$(whoami)/bootfs
  └─sdb2                      8:18   1  29.2G  0 part /media/$(whoami)/rootfs

$ sudo cp arch/arm64/boot/Image.gz /media/$(whoami)/bootfs/$KERNEL.img
$ sudo cp arch/arm64/boot/dts/broadcom/*.dtb /media/$(whoami)/bootfs
$ sudo cp arch/arm64/boot/dts/overlays/*.dtb* /media/$(whoami)/bootfs/overlays/
$ sudo cp arch/arm64/boot/dts/overlays/README /media/$(whoami)/bootfs/overlays/

# you can use "make kernelversion" to check kernel version
$ sudo cp -ra modules/lib/modules/$(make kernelversion)-v8-16k-tn-raspi/ /media/$(whoami)/rootfs/lib/modules/.
$ sync

# unmount SD card
$ umount /dev/sdb? -
Boot RPI5 with SD card.
-
Modify the config.txt file to add the camera configuraion.
$ sudo nano /boot/firmware/config.txt

# Automatically load overlays for detected cameras
camera_auto_detect=0
dtoverlay=tevs-rpi22,cam0
dtoverlay=tevs-rpi22
Modify
camera_auto_detect=0and adddtoverlay=tevs-rpi22,cam0,dtoverlay=tevs-rpi22after the line. ThenCtrl+sto save file andCtrl+xto exit. -
Restart system.
$ sudo reboot
Bring up Camera by GStreamer
If you succeed in initialing the camera, you can follow the steps to open the camera.
RPi5 always requires Media Controller to configure the pipeline as the front end is more complex since you can't just drive it from /dev/video8.
-
Check the media device.
infoThe /dev/media node number (for example /dev/media0) may not always be the same in your system, as they are not fixed allocations. We use “/dev/media0“ for “Raspberry Pi 5 - CAM/DISP 0“ in our example below.
If the node number is correct, you can find the entity name “tevs 10-0048“ in the device topology.
infoThe entity name “tevs 10-0048" is from the kernel 6.12. You will see the entity name "tevs 6-0048" in the kernel 6.6.
$ media-ctl -d /dev/media0 -p

Device topology
- entity 1: csi2 (8 pads, 8 links)
            type V4L2 subdev subtype Unknown flags 0
            device node name /dev/v4l-subdev3
        pad0: Sink
                [fmt:SRGGB10_1X10/640x480 field:none colorspace:raw xfer:none ycbcr:601 quantization:full-range]
                <- "tevs 10-0048":0 [ENABLED,IMMUTABLE]
        pad1: Sink
                [fmt:unknown/16384x1 field:none]
        pad2: Sink
                [fmt:SRGGB10_1X10/640x480 field:none colorspace:raw xfer:none ycbcr:601 quantization:full-range]
        pad3: Sink
                [fmt:SRGGB10_1X10/640x480 field:none colorspace:raw xfer:none ycbcr:601 quantization:full-range]
        pad4: Source
                [fmt:SRGGB10_1X10/640x480 field:none colorspace:raw xfer:none ycbcr:601 quantization:full-range]
                -> "rp1-cfe-csi2_ch0":0 []
                -> "pisp-fe":0 []
        pad5: Source
                [fmt:unknown/16384x1 field:none]
                -> "rp1-cfe-embedded":0 []
        pad6: Source
                [fmt:SRGGB10_1X10/640x480 field:none colorspace:raw xfer:none ycbcr:601 quantization:full-range]
                -> "rp1-cfe-csi2_ch2":0 []
                -> "pisp-fe":0 []
        pad7: Source
                [fmt:SRGGB10_1X10/640x480 field:none colorspace:raw xfer:none ycbcr:601 quantization:full-range]
                -> "rp1-cfe-csi2_ch3":0 []
                -> "pisp-fe":0 []

- entity 10: pisp-fe (5 pads, 7 links)
            type V4L2 subdev subtype Unknown flags 0
            device node name /dev/v4l-subdev4
        pad0: Sink
                [fmt:SRGGB16_1X16/640x480 field:none colorspace:raw xfer:none ycbcr:601 quantization:full-range]
                <- "csi2":4 []
                <- "csi2":6 []
                <- "csi2":7 []
        pad1: Sink
                [fmt:FIXED/16384x1 field:none]
                <- "rp1-cfe-fe_config":0 []
        pad2: Source
                [fmt:SRGGB16_1X16/640x480 field:none colorspace:raw xfer:none ycbcr:601 quantization:full-range]
                -> "rp1-cfe-fe_image0":0 []
        pad3: Source
                [fmt:SRGGB16_1X16/640x480 field:none colorspace:raw xfer:none ycbcr:601 quantization:full-range]
                -> "rp1-cfe-fe_image1":0 []
        pad4: Source
                [fmt:FIXED/16384x1 field:none]
                -> "rp1-cfe-fe_stats":0 []

- entity 16: tevs 10-0048 (1 pad, 1 link)
            type V4L2 subdev subtype Sensor flags 0
            device node name /dev/v4l-subdev5
        pad0: Source
                [fmt:UYVY8_2X8/640x480@1/120 field:none colorspace:srgb xfer:srgb ycbcr:601 quantization:full-range
                crop.bounds:(0,0)/640x480
                crop:(0,0)/640x480]
                -> "csi2":0 [ENABLED,IMMUTABLE]

- entity 18: rp1-cfe-csi2_ch0 (1 pad, 1 link)
            type Node subtype V4L flags 0
            device node name /dev/video8
        pad0: Sink
                <- "csi2":4 []

... -
Install GStreamer. (only for the first time)
$ sudo apt-get install -y libgstreamer1.0-dev libgstreamer-plugins-base1.0-dev libgstreamer-plugins-bad1.0-dev \
gstreamer1.0-plugins-base gstreamer1.0-plugins-base-apps gstreamer1.0-plugins-good gstreamer1.0-plugins-bad \
gstreamer1.0-plugins-ugly gstreamer1.0-libav gstreamer1.0-tools gstreamer1.0-x gstreamer1.0-alsa gstreamer1.0-gl \
gstreamer1.0-gtk3 gstreamer1.0-pulseaudio -
Enable csi2 link for video8 node.
$ media-ctl -d /dev/media0 -l "'csi2':4 -> 'rp1-cfe-csi2_ch0':0 [1]" -
List camera formats, resolutions and frame interval.
noteYou can find “/dev/v4l-subdev5 “ in entity of tevs 10-0048.
# formats
$ v4l2-ctl -d /dev/v4l-subdev5 --list-subdev-mbus-codes
ioctl: VIDIOC_SUBDEV_ENUM_MBUS_CODE (pad=0)
        0x200f: MEDIA_BUS_FMT_UYVY8_1X16

# resolutions
$ v4l2-ctl -d /dev/v4l-subdev5 --list-subdev-framesize code=0x200f
ioctl: VIDIOC_SUBDEV_ENUM_FRAME_SIZE (pad=0)
        Size Range: 640x480 - 640x480
        Size Range: 1280x720 - 1280x720
        Size Range: 1280x800 - 1280x800

# frame interval of resolution
$ v4l2-ctl -d /dev/v4l-subdev5 --list-subdev-frameintervals width=640,height=480,code=0x200f
ioctl: VIDIOC_SUBDEV_ENUM_FRAME_INTERVAL (pad=0)
        Interval: 0.017s (60.000 fps)

$ v4l2-ctl -d /dev/v4l-subdev5 --list-subdev-frameintervals width=1280,height=720,code=0x200f
ioctl: VIDIOC_SUBDEV_ENUM_FRAME_INTERVAL (pad=0)
        Interval: 0.017s (60.000 fps)

$ v4l2-ctl -d /dev/v4l-subdev5 --list-subdev-frameintervals width=1280,height=800,code=0x200f
ioctl: VIDIOC_SUBDEV_ENUM_FRAME_INTERVAL (pad=0)
Interval: 0.017s (60.000 fps) -
Bring up the camera (/dev/video8) with 640x480 by Gstreamer pipeline.
$ media-ctl -d /dev/media0 -V "'tevs 10-0048':0 [fmt:UYVY8_1X16/640x480 field:none colorspace:srgb xfer:srgb ycbcr:601]"
$ DISPLAY=:0 gst-launch-1.0 v4l2src device=/dev/video8 ! \
"video/x-raw, format=(string)UYVY, width=(int)640, height=(int)480" ! \
videoconvert ! fpsdisplaysink video-sink=xvimagesink sync=false --no-position -
Change resolution with 1280x720 and bring up by Gstreamer pipeline directly.
$ media-ctl -d /dev/media0 -V "'tevs 10-0048':0 [fmt:UYVY8_1X16/1280x720 field:none colorspace:srgb xfer:srgb ycbcr:601]"
$ DISPLAY=:0 gst-launch-1.0 v4l2src device=/dev/video8 ! \
"video/x-raw, format=(string)UYVY, width=(int)1280, height=(int)720" ! \
videoconvert ! fpsdisplaysink video-sink=xvimagesink sync=false --no-position
Troubleshooting
Recover camera
This tool only support RPi5 kernel 6.12.y, and ensures that the tevs driver is the latest version.
If the camera firmware update fails or other factors cause the camera firmware to breakdown, you can use the recovery tool to force a firmware refresh. However, if the camera is working normally, this tool cannot be used to update the firmware.
-
Download recovery tool.
$ wget https://download.technexion.com/demo_software/EVK/RPI/RPI5/tevs-recovery-tool/latest/tn_recovery_tool_rpi5_6.12.y.tar.gz -
Uncompress the tool.
$ tar xf tn_recovery_tool_rpi5_6.12.y.tar.gz -
Install VizionSDK.
tipIf you don't installed the VizionSDK or your installed version is lower than 26.1.1 (including this version), please install the installation file in the folder first. Otherwise, you can skip this step.
$ cd tn_recovery_tool_rpi5_6.12.y
$ sudo apt install ./vizionsdk-arm64-26.1.1.deb -
Execute tool to recover camera.
$ cd tn_recovery_tool_rpi5_6.12.y
$ sh recovery_tool.sh -h
Verify input argument fail!
Usage: recovery.sh [I2C_BUS] [I2C_ID] [CAM_NAME]
    [I2C_BUS]: I2C bus index, 10 is a example
    [I2C_ID]: I2C device address, 0x48 is a example (hex)
    [CAM_NAME]: Camera product name, as follows:
                - TEVS-AR0144
                - TEVS-AR0145-M
                - TEVS-AR0234
                - TEVS-AR0521
                - TEVS-AR0522
                - TEVS-AR0522-M
                - TEVS-AR0821
                - TEVS-AR0822
                - TEVS-AR0822-M
                - TEVS-AR1335
In RPi5, the I2C_BUS of camera 0 is 10, and the I2C_BUS of camera 1 is 11. The I2C_ID is fixed at 0x48.
For example, TEVS-AR0144 on camera 0.$ sh recovery_tool.sh 10 0x48 TEVS-AR0144
TechNexion TEVS camera recovery tool for RPi5
TEVS firmware version 25.10.00.01
Camera0 cannot found
Camera0 found RPI22 adaptor
Camera1 found
Camera1 found RPI22 adaptor
Warning: Do not turn off power or disconnect camera during update
Info: Starting ISP firmware update with direct I2C/subdev path...
[2026-02-23 11:57:22.574] [warning] [UpgradeSensorFW][64] Recovery mode enabled: skip device MCU type check, use firmware MCU type.
[2026-02-23 11:57:22.574] [info] [UpgradeSensorFW][78] Bin Version: 25.10.0.1
[2026-02-23 11:57:22.574] [info] [UpgradeSensorFW][80] Control Addr: 0x00000000, Len: 0x00006640
[2026-02-23 11:57:22.574] [info] [UpgradeSensorFW][82] Bootdata Addr: 0x0000a800, Len: 0x00014688
[2026-02-23 11:57:22.574] [info] [UpgradeSensorFW][86] Product Info Addr: 0x0001fc00, Len: 0x00000000
[2026-02-23 11:57:22.880] [warning] [RunBSLHookCommand][31] BSL hook command exited with timeout code 124. command:
if [ "$I2C_BUS" -eq 10 ]; then
pinctrl set 34 op dl
timeout 0.1s gpioset -c 15 6=1
pinctrl set 34 op dh
sleep 0.1
timeout 0.1s gpioset -c 15 6=0
elif [ "$I2C_BUS" -eq 11 ]; then
pinctrl set 46 op dl
timeout 0.1s gpioset -c 14 6=1
pinctrl set 46 op dh
sleep 0.1
timeout 0.1s gpioset -c 14 6=0
fi
[2026-02-23 11:57:22.880] [warning] [SetBSLMode][87] BSL hook command failed, continue and rely on subsequent ping to verify BSL state.
[2026-02-23 11:57:23.285] [error] [ReadWriteI2C][45] Failed to write to the i2c bus: Connection timed out
[2026-02-23 11:57:23.285] [warning] [CheckDriver][124] TEVS-HEADLESS-I2C start to change the BSL mode in second time
[2026-02-23 11:57:23.285] [info] [CheckDriver][139] BSL mode reset to 0 after 1 attempt(s)
[2026-02-23 11:57:23.591] [warning] [RunBSLHookCommand][31] BSL hook command exited with timeout code 124. command:
if [ "$I2C_BUS" -eq 10 ]; then
pinctrl set 34 op dl
timeout 0.1s gpioset -c 15 6=1
pinctrl set 34 op dh
sleep 0.1
timeout 0.1s gpioset -c 15 6=0
elif [ "$I2C_BUS" -eq 11 ]; then
pinctrl set 46 op dl
timeout 0.1s gpioset -c 14 6=1
pinctrl set 46 op dh
sleep 0.1
timeout 0.1s gpioset -c 14 6=0
fi
[2026-02-23 11:57:23.591] [warning] [SetBSLMode][87] BSL hook command failed, continue and rely on subsequent ping to verify BSL state.
[2026-02-23 11:57:23.595] [info] [UpdateSensorFirmwareRevA][424] Start to clean sensor.
[2026-02-23 11:57:24.606] [info] [UpdateSensorFirmwareRevA][430] Clean sensor done.
Update progress: 50%[2026-02-23 11:57:26.209] [info] [UpdateSensorFirmwareRevA][441] start verification mcu control
[2026-02-23 11:57:27.021] [info] [UpdateSensorFirmwareRevA][449] Verification mcu control done
Update progress: 99%[2026-02-23 11:57:32.131] [info] [UpdateSensorFirmwareRevA][458] start verification bootdata
[2026-02-23 11:57:32.944] [info] [UpdateSensorFirmwareRevA][478] Verification bootdata done
Update progress: 100%Successfully set ISP firmware update completed 0
Info: Please restart the camera to apply changes -
Restart RPi5.