NXP IMX93LPDDR4X-EVK board Camera Usage Guide
🚀 Introduction
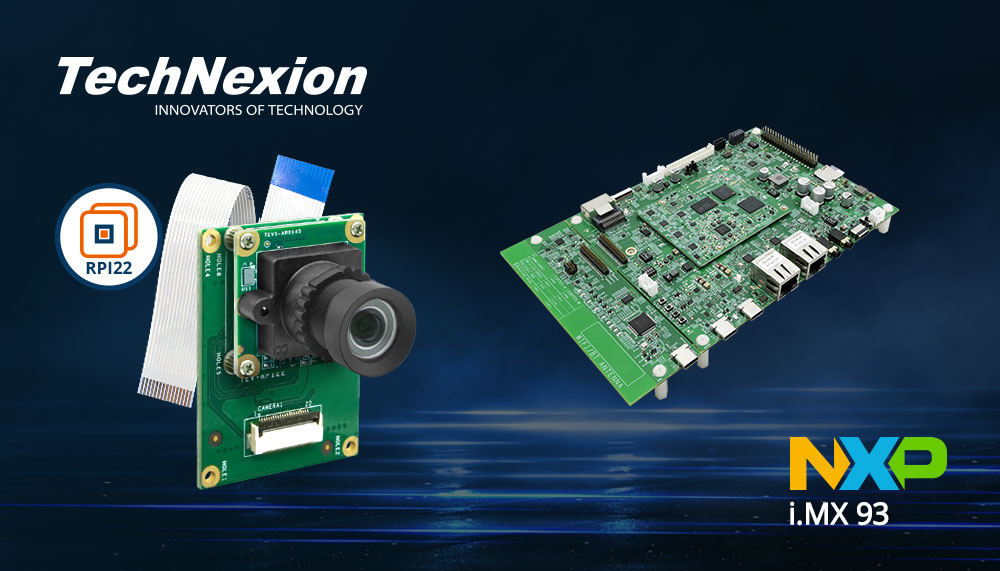
This article guides you how to get started using TechNexion camera modules on NXP IMX93LPDDR4X-EVK board.
📸 Supported Camera Modules
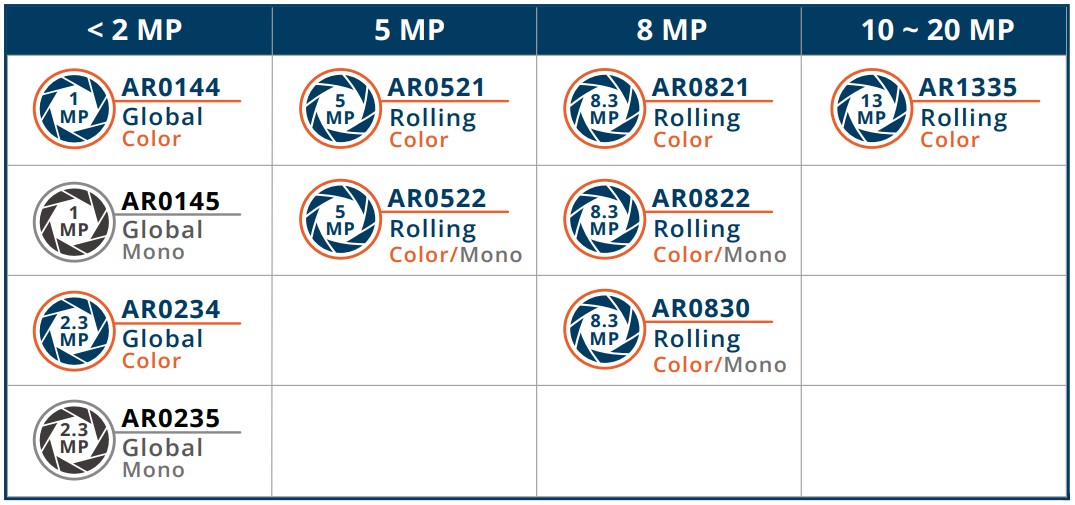
- TEVS Series
- TEVM Series
| Camera Series | Products |
|---|---|
| TEVS | TEVS-AR0144 TEVS-AR0145 TEVS-AR0234 TEVS-AR0235 TEVS-AR0246 TEVS-AR0521 TEVS-AR0522 TEVS-AR0544 TEVS-AR0821 TEVS-AR0822 TEVS-AR0830 TEVS-AR1335 TEVS-AR2020 |
| Camera Series | Products |
|---|---|
| TEVM | TEVM-AR0144 TEVM-AR0145 TEVM-AR0234 TEVM-AR0235 TEVM-AR0246 TEVM-AR0521 TEVM-AR0522 TEVM-AR0544 TEVM-AR0821 TEVM-AR0822 TEVM-AR0830 TEVM-AR1335 TEVM-AR2020 |
🔧 Hardware Setup Instructions
Connect the Adapter Board and Camera Cable
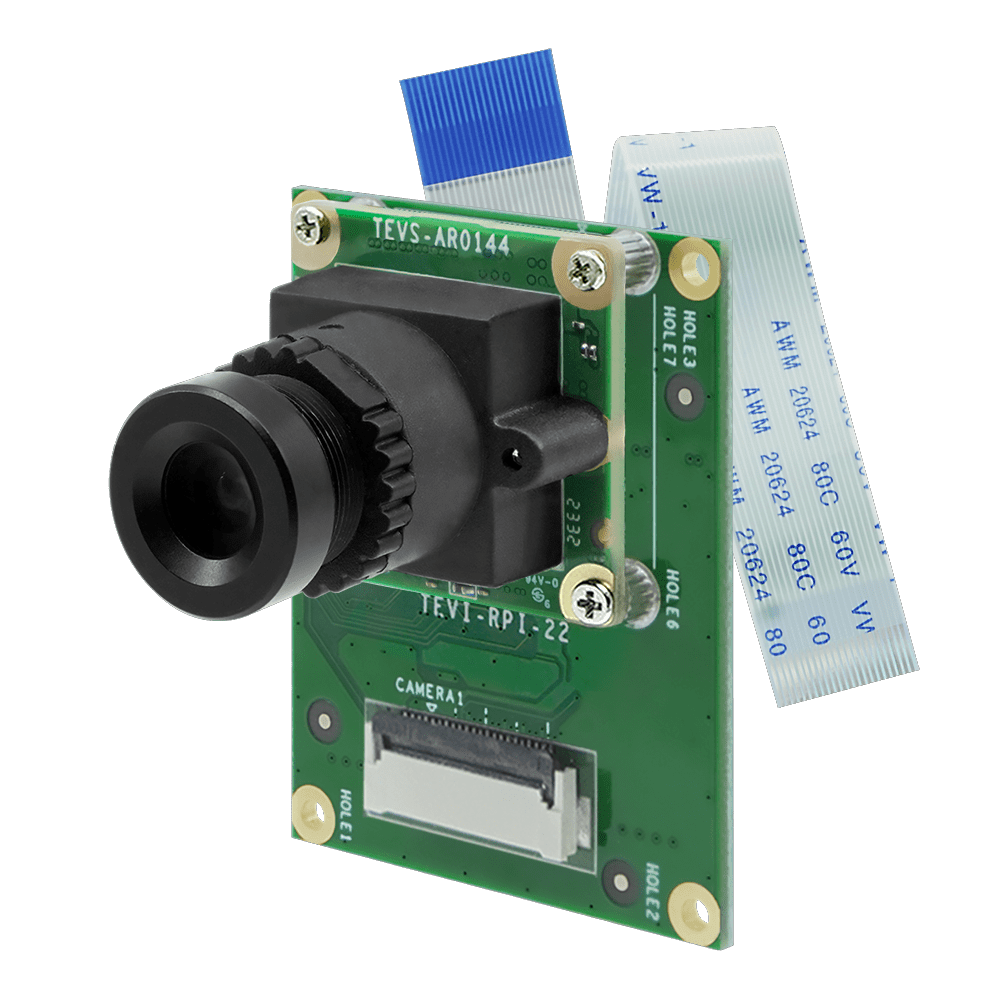
To set up TechNexion camera, connect the adapter board and camera cable to the MIPI CSI port on the EVK board.
🧰 Camera Installation Instructions
We provide some methods to install camera driver and device tree blobs. Depending on your needs, you can choose the most suitable method. If you are new to this, we recommend starting with Method 1. If you want to customized your Yocto project or Linux kernel, you can try Method 2 or Method 3. If you have a custom Linux kernel and device tree, you can try Method 4.
Method 1 - Using TechNexion Pre-built image
Prepare Yocto demo image for testing TechNexion camera
To test TechNexion TEVS Series cameras, you need a demo image that includes the required Device Tree Blobs (DTBs) and camera drivers.
Download and Select the Correct Image for Your EVK
Prebuilt demo images can be available for download via TechNexion's server.
Download Link:
🔗 Download Prebuilt Image for IMX93LPDDR4X-EVK
Flashing the Image
You can flash the image to an SD Card using the following methods:
Make sure your EVK board is set to boot from SD card.
Refer to the official NXP guide 🔗 Getting Started with the i.MX93 EVK
- For Windows Users
- For Linux Users
Use balenaEtcher to write the image to your SD card:
🔗 
Use bmap-tools for a fast and reliable flashing process to the SD card:
sudo apt-get update
sudo apt-get install bmap-tools
Method 2 - Build Yocto image with TechNexion BSP
TechNexion supports building a Yocto-based Linux image tailored for camera modules using the following kernel and branch.
If you are using prebuilt demo image, you can skip this section. Please refer to 📸 Camera Testing Instructions section for camera testing steps.
Supported Linux Kernel
| Linux Kernel Version | Yocto Branch |
|---|---|
| 6.18.20 | tn-imx_6.18.20_2.0.0-stable |
Source and Build Instructions
🔗 Fetch Yocto source
📖 Build Yocto (Instructions for IMX93LPDDR4X-EVK)
Method 3 - Build Linux kernel with TechNexion source code
Clone the Kernel Source
Fetch and compile Linux kernel.
- Host OS: Ubuntu 22.04
- Toolchain:
aarch64-linux-gnu-gcc-11
Install cross-compile & dependency tools.
$ sudo apt update
$ sudo apt install -y gcc-aarch64-linux-gnu libncurses-dev libssl-dev bison flex git make
Clone the Kernel Source
# For Kernel 6.18.20
$ git clone https://github.com/TechNexion/linux-tn-imx.git -b tn-imx_6.18.20_2.0.0-stable
Set cross-compile environment & the kernel config.
$ export ARCH=arm64
$ export CROSS_COMPILE=/usr/bin/aarch64-linux-gnu-
$ cd linux-tn-imx
~/linux-tn-imx$ make imx_v8_defconfig
Compile the kernel & module driver.
# compile kernel
~/linux-tn-imx$ make -j$(nproc)
# create kernel module folder
~/linux-tn-imx$ mkdir -p ./modules
# compile module driver
~/linux-tn-imx$ rm -rf ./modules/*
~/linux-tn-imx$ make INSTALL_MOD_PATH=./modules modules_install
Change kernel Image, DTB & modules.
~/linux-tn-imx/$ cp arch/arm64/boot/Image  <mount_folder>/boot/Image
~/linux-tn-imx/$ cp arch/arm64/boot/dts/freescale/imx93-11x11-evk-tevs-rpi22.dtb  <mount_folder>/boot/
~/linux-tn-imx/$ sudo cp -r ./modules/lib/modules/*  <mount_folder>/root/lib/modules/
Method 4 - Build custom Linux kernel with camera driver
-
Download the camera driver and device tree blobs.
$ git clone https://github.com/TechNexion-Vision/nxp_evk_camera.git -b tn-imx_6.18.20_2.0.0-stable -
Copy to your kernel source code.
$ cd nxp_evk_camera/

~/nxp_evk_camera$ cp arch/arm64/boot/dts/freescale/imx93-11x11-evk-tevs-rpi22.dts <fetch_kernel_folder>/arch/arm64/boot/dts/freescale/ -
Modify makefile to add driver.
$ cd <fetch_kernel_folder>/driver/media/i2c/
~/<fetch_kernel_folder>/driver/media/i2c/$ vi Makefile
Add this line in Makefile.
obj-$(CONFIG_VIDEO_TEVS) += tevs/
you can refer to linux-tn-imx/drivers/media/i2c/Makefile
-
Modify Kconfig to add camera config.
~/<fetch_kernel_folder>/driver/media/i2c/$ vi KconfigAdd this part under "Camera sensor devices" menu in Kconfig.
config VIDEO_TEVS
  tristate "TechNexion TEVS sensor support"
  depends on OF
  depends on GPIOLIB
  select REGMAP_I2C
  select V4L2_CCI_I2C
  default m
  help
    This is a Video4Linux2 sensor driver for the TechNexion
    TEVS camera sensor with a MIPI CSI-2 interface.
you can refer to linux-tn-imx/drivers/media/i2c/Kconfig
-
Modify makefile to add device tree.
$ cd <fetch_kernel_folder>/arch/arm64/boot/dts/freescale/
~/<fatch_kernel_folder>/arch/arm64/boot/dts/freescale/$ vi Makefile
Add this line in Makefile.
dtb-$(CONFIG_ARCH_MXC) += imx93-11x11-evk-tevs-rpi22.dtb
you can refer to linux-tn-imx/arch/arm64/boot/dts/freescale/Makefile
-
Compile the kernel & module driver.
Finally, you can start compiling your new Image files, then copy and replace the Image files in the SD card.
📸 Camera Testing Instructions
Specify Camera DTBO in U-Boot
-
Connect the debug console cable to the baseboard (via USB-C).
-
Power on the board and interrupt the boot process. Keep pressing
Enterwhen the following message appears:Hit any key to stop autoboot: -
Specify the appropriate device tree for your camera using the
fdtfileenvironment variable in U-Boot:
u-boot=> setenv fdtfile imx93-11x11-evk-tevs-rpi22.dtb
- Save and continue the boot process:
u-boot=> saveenv
u-boot=> boot
🎥 Start Camera Video Stream via GStreamer
Check Camera Availability
Use the v4l2-ctl tool to list connected video devices.
$ v4l2-ctl --list-devices
Example output:
mxc-isi-cap (platform:4ae40000.isi):
        /dev/video0
        /dev/video1
        /dev/media0
To verify that the camera has been properly connected and linked, use the media-ctl command:
$ media-ctl -p
This will display media controller information, such as:
Media controller API version 6.18.20

Media device information
------------------------
driver          mxc-isi
model           FSL Capture Media Device
serial
bus info        platform:4ae40000.isi
hw revision     0x0
driver version  6.18.20

Device topology
- entity 1: crossbar (3 pads, 3 links, 1 route)
            type V4L2 subdev subtype Unknown flags 0
            device node name /dev/v4l-subdev0
        routes:
                0/0 -> 2/0 [ACTIVE]
        pad0: SINK,MUST_CONNECT
                [stream:0 fmt:UYVY8_1X16/1920x1080 field:none colorspace:srgb xfer:srgb ycbcr:601 quantization:lim-range]
                <- "csidev-4ae00000.csi":1 [ENABLED,IMMUTABLE]
        pad1: SINK,MUST_CONNECT
                <- "mxc_isi.output":0 [ENABLED,IMMUTABLE]
        pad2: SOURCE
                [stream:0 fmt:UYVY8_1X16/1920x1080 field:none colorspace:srgb xfer:srgb ycbcr:601 quantization:lim-range]
                -> "mxc_isi.0":0 [ENABLED,IMMUTABLE]

- entity 5: mxc_isi.0 (2 pads, 2 links, 0 routes)
            type V4L2 subdev subtype Unknown flags 0
            device node name /dev/v4l-subdev1
        pad0: SINK
                [stream:0 fmt:UYVY8_1X16/1920x1080 field:none colorspace:jpeg xfer:srgb ycbcr:601 quantization:full-range
                 compose.bounds:(0,0)/1920x1080
                 compose:(0,0)/1920x1080]
                <- "crossbar":2 [ENABLED,IMMUTABLE]
        pad1: SOURCE
                [stream:0 fmt:YUV8_1X24/1920x1080 field:none colorspace:jpeg xfer:srgb ycbcr:601 quantization:full-range
                 crop.bounds:(0,0)/1920x1080
                 crop:(0,0)/1920x1080]
                -> "mxc_isi.0.capture":0 [ENABLED,IMMUTABLE]

- entity 8: mxc_isi.0.capture (1 pad, 1 link)
            type Node subtype V4L flags 0
            device node name /dev/video0
        pad0: SINK
                <- "mxc_isi.0":1 [ENABLED,IMMUTABLE]

- entity 16: mxc_isi.output (1 pad, 1 link)
             type Node subtype V4L flags 0
        pad0: SOURCE
                -> "crossbar":1 [ENABLED,IMMUTABLE]

- entity 23: csidev-4ae00000.csi (2 pads, 2 links, 1 route)
             type V4L2 subdev subtype Unknown flags 0
             device node name /dev/v4l-subdev2
        routes:
                0/0 -> 1/0 [ACTIVE]
        pad0: SINK
                [stream:0 fmt:UYVY8_1X16/1920x1080 field:none colorspace:smpte170m xfer:709 ycbcr:601 quantization:lim-range]
                <- "tevs 2-0048":0 [ENABLED]
        pad1: SOURCE
                [stream:0 fmt:UYVY8_1X16/1920x1080 field:none colorspace:smpte170m xfer:709 ycbcr:601 quantization:lim-range]
                -> "crossbar":0 [ENABLED,IMMUTABLE]

- entity 28: tevs 2-0048 (1 pad, 1 link, 0 routes)
             type V4L2 subdev subtype Sensor flags 0
             device node name /dev/v4l-subdev3
        pad0: SOURCE
                [stream:0 fmt:UYVY8_1X16/640x480@1/60 field:none colorspace:srgb xfer:srgb ycbcr:601 quantization:full-range
                 crop.bounds:(0,0)/1280x800
                 crop:(0,0)/640x480]
                -> "csidev-4ae00000.csi":0 [ENABLED]
Set the resolution and format of all media entities to match the camera's output. This means all components in the media pipeline must align with the camera's output settings.
Use the v4l2-ctl command to check the camera's supported formats, resolutions, and frame intervals.
# formats
$ v4l2-ctl -d /dev/v4l-subdev3 --list-subdev-mbus-codes
  ioctl: VIDIOC_SUBDEV_ENUM_MBUS_CODE (pad=0,stream=0)
          0x200f: MEDIA_BUS_FMT_UYVY8_1X16

# resolutions
$ v4l2-ctl -d /dev/v4l-subdev3 --list-subdev-framesize code=0x200f
  ioctl: VIDIOC_SUBDEV_ENUM_FRAME_SIZE (pad=0,stream=0)
          Size Range: 640x480 - 640x480
          Size Range: 1280x720 - 1280x720
          Size Range: 1280x800 - 1280x800

# frame interval of resolution
$ v4l2-ctl -d /dev/v4l-subdev3 --list-subdev-frameintervals width=640,height=480,code=0x200f
  ioctl: VIDIOC_SUBDEV_ENUM_FRAME_INTERVAL (pad=0,stream=0)
          Interval: 0.017s (60.000 fps)
          Interval: 0.033s (30.000 fps)
          Interval: 0.050s (20.000 fps)
          Interval: 0.067s (15.000 fps)
          Interval: 0.100s (10.000 fps)
          Interval: 0.200s (5.000 fps)

$ v4l2-ctl -d /dev/v4l-subdev3 --list-subdev-frameintervals width=1280,height=720,code=0x200f
  ioctl: VIDIOC_SUBDEV_ENUM_FRAME_INTERVAL (pad=0,stream=0)
          Interval: 0.017s (60.000 fps)
          Interval: 0.033s (30.000 fps)
          Interval: 0.050s (20.000 fps)
          Interval: 0.067s (15.000 fps)
          Interval: 0.100s (10.000 fps)
          Interval: 0.200s (5.000 fps)

$ v4l2-ctl -d /dev/v4l-subdev3 --list-subdev-frameintervals width=1280,height=800,code=0x200f
  ioctl: VIDIOC_SUBDEV_ENUM_FRAME_INTERVAL (pad=0,stream=0)
          Interval: 0.017s (60.000 fps)
          Interval: 0.033s (30.000 fps)
          Interval: 0.050s (20.000 fps)
          Interval: 0.067s (15.000 fps)
          Interval: 0.100s (10.000 fps)
          Interval: 0.200s (5.000 fps)
Launch GStreamer Pipeline
Bring up the camera (/dev/video0) with 1280x720 at 30 FPS by Gstreamer pipeline :
$ media-ctl -V "'crossbar':0 [fmt:UYVY8_1X16/1280x720 field:none colorspace:srgb xfer:srgb ycbcr:601]"
$ media-ctl -V "'mxc_isi.0':0 [fmt:UYVY8_1X16/1280x720 field:none colorspace:srgb xfer:srgb ycbcr:601]"
$ media-ctl -V "'csidev-4ae00000.csi':0 [fmt:UYVY8_1X16/1280x720 field:none colorspace:srgb xfer:srgb ycbcr:601]"
$ media-ctl -V "'tevs 2-0048':0 [fmt:UYVY8_1X16/1280x720@1/30 field:none colorspace:srgb xfer:srgb ycbcr:601]"
$ gst-launch-1.0 v4l2src device=/dev/video0 ! "video/x-raw, format=YUY2, width=1280, height=720" ! fpsdisplaysink video-sink=waylandsink sync=false -v
Bring up the camera (/dev/video0) with 640x480 at 60 FPS by Gstreamer pipeline :
$ media-ctl -V "'crossbar':0 [fmt:UYVY8_1X16/640x480 field:none colorspace:srgb xfer:srgb ycbcr:601]"
$ media-ctl -V "'mxc_isi.0':0 [fmt:UYVY8_1X16/640x480 field:none colorspace:srgb xfer:srgb ycbcr:601]"
$ media-ctl -V "'csidev-4ae00000.csi':0 [fmt:UYVY8_1X16/640x480 field:none colorspace:srgb xfer:srgb ycbcr:601]"
$ media-ctl -V "'tevs 2-0048':0 [fmt:UYVY8_1X16/640x480@1/60 field:none colorspace:srgb xfer:srgb ycbcr:601]"
$ gst-launch-1.0 v4l2src device=/dev/video0 ! "video/x-raw, format=YUY2, width=640, height=480" ! fpsdisplaysink video-sink=waylandsink sync=false -v
🚨 Troubleshooting
Boot up NXP IMX93LPDDR4X-EVK and check initialization of TEVS driver. If it shows below messages, the driver is initialized correctly.
$ dmesg -t | grep tevs

  tevs 2-0048: tevs_probe() device node: tevs@48
  tevs 2-0048: Version:26.3.0.1
  tevs 2-0048: Product:TEVS-AR0144, HeaderVer:3, MIPI_Rate:800
  tevs 2-0048: Chip ID: 0x0356
  tevs 2-0048: probe success
Ensure camera device tree blob(DTB) is specified correctly.
$ dmesg -t | grep -i model
  Machine model: NXP i.MX93 11x11 EVK board with TechNexion TEVS AR camera