TI BeagleY-AI TEVS Camera Usage Guide
Introduction
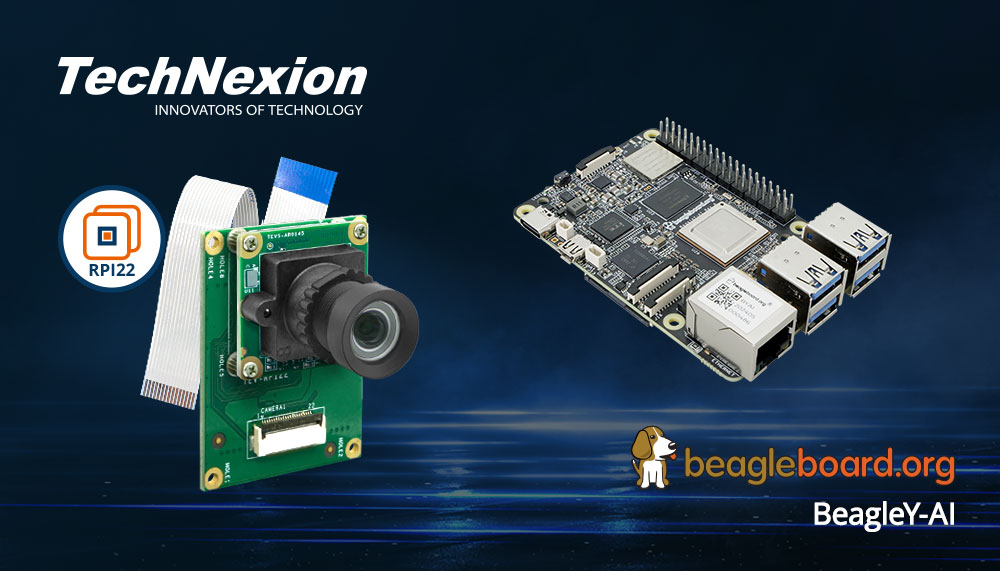
TechNexion Embedded Vision Solutions provide embedded system developers access to high-performance, industrial-grade camera solutions to accelerate their time to market for embedded vision projects.
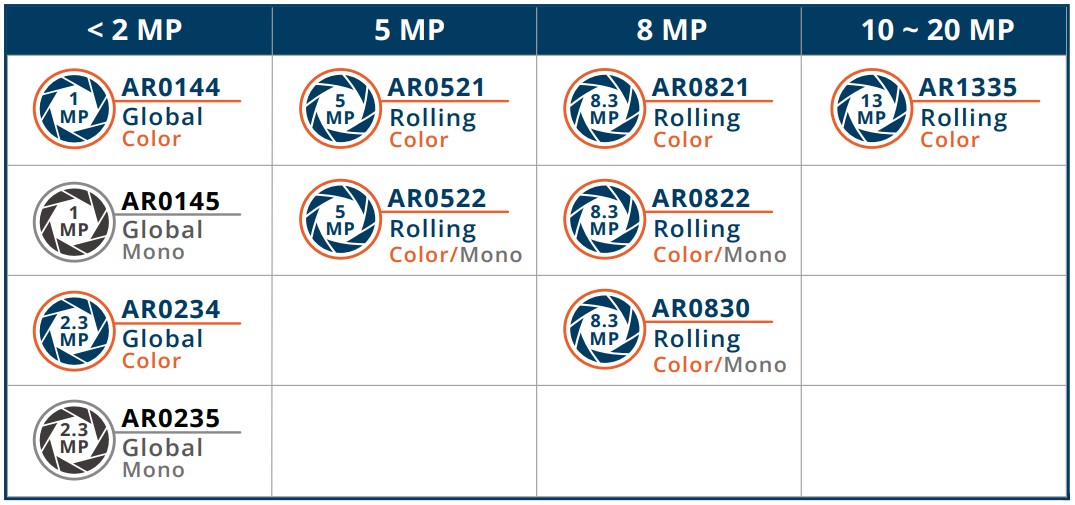
Support Camera Modules
| Camera Series | Products |
|---|---|
| TEVS | TEVS-AR0144 TEVS-AR0145 TEVS-AR0234 TEVS-AR0235 TEVS-AR0246 TEVS-AR0521 TEVS-AR0522 TEVS-AR0544 TEVS-AR0821 TEVS-AR0822 TEVS-AR0830 TEVS-AR1335 TEVS-AR2020 |
Check here ! 🔗 TechNexion Embedded Vision Solutions
Find out the solution which can accelerate your time to market for embedded vision projects.
Support System Version
Supported TI Development Kit
| SoM | Board |
|---|---|
| AM67A | BeagleY-AI |
Install TN Camera on TI Development Kit
Adaptor for BeagleY-AI
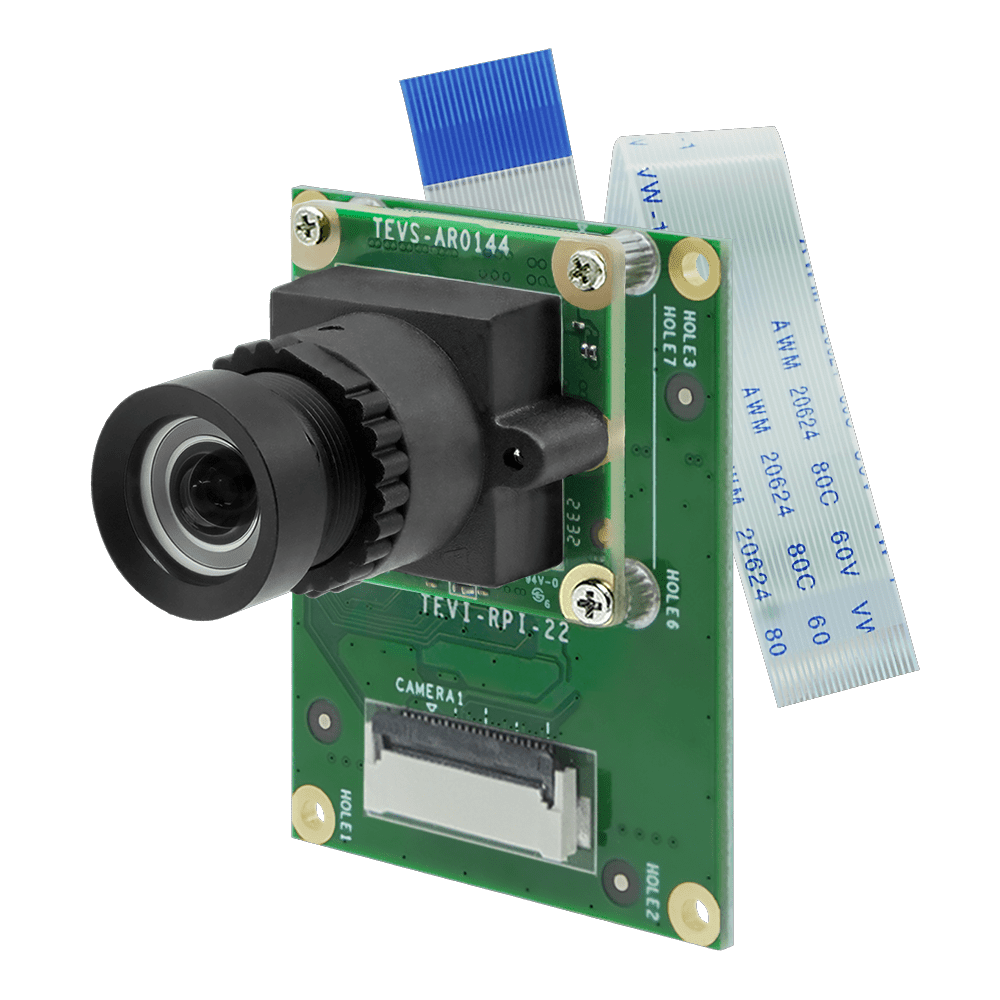
TEVS-RPI22 Adaptor for TEVS
Connect TEVS camera and TEVS-RPI22 adaptor to BeagleY-AI - "CSI0" directly.
Method 1 - Using Technexion Pre-built modules, only for kernel 6.1.80-ti-arm64-r57
-
Make a SD card with "BeagleY-AI Debian 12.5 2024-06-19 XFCE" image.
-
Mount boot partition and configure sysconf.txt before the first boot.
$ vim /media/${user}/BOOT/sysconf.txt

> # root_password - Set a password for the root user (not used in ubuntu)
> root_password=root
>
> # user_name - Set a user name for the user (1000)
> user_name=beagle
>
> # user_password - Set a password for user (1000)
> user_password=beagle -
Boot BeagleY-AI with SD card.
-
Download pre-built modules.
$ wget https://download.technexion.com/demo_software/EVK/TI/BeagleY-AI/pre-built-modules/latest/tn_camera_module_beagley_ai_6.1.80.tar.gz -
Uncompress the modules.
$ tar -xf tn_camera_module_beagley_ai_6.1.80.tar.gz -
Run installation script.
$ cd tn_camera_module_beagley_ai_6.1.80/
$ sh tn_install.sh
[sudo] password for beagle:
****** TechNexion Camera Driver Installation ******
This installation is easy to install TechnNexion Camera Drivers for BeagleY-AI.
Before start to install camera driver, You should BACKUP your image and config
to avoid any file you lost while installing process.
Do you want to continue?[Y/n]y
Continuing with the installation...
Install TN-CAM modules: tevs.ko.xz
Installed TN-CAM module file Done.
Install TN-CAM DTBO file: k3-am67a-beagley-ai-csi0-tevs-rpi22.dtbo
Installed TN-CAM DTBO file Done.
Add TN-CAM Configuration for modules: tevs-rpi22
label microSD (default)
Install TN-CAM service...
Launch TN-CAM Service...
Created symlink /etc/systemd/system/multi-user.target.wants/tn_cam.service → /etc/systemd/system/tn_cam.service.
Finish Camera Driver Installation. Return Code:[1]
You should Reboot Device to enable TEVS Cameras.
Do you want to reboot now?[Y/n]y
Rebooting....
Method 2 - Build drivers from source code (cross-compiling)
-
You can reference BeagleBone Cookbook - The Kernel.
-
Make sure the dependencies.
$ sudo apt install -y git bc bison flex libssl-dev make libc6-dev libncurses5-dev

# Install the 64-bit toolchain for a 64-bit kernel
$ sudo apt install -y crossbuild-essential-arm64 -
Get the kernel sources.
# beagleboard linux kerbel
$ git clone --depth=1 -b v6.1.80-ti-arm64-r57 https://github.com/beagleboard/linux.git

# technexion beagle camera driver
$ git clone --depth=1 -b v6.1.80-ti-arm64 https://github.com/TechNexion-Vision/beagle_devkit_camera_driver.git -
Copy TN beagle camera driver to beagleboard linux kernel.
$ cp -rv beagle_devkit_camera_driver/drivers/media/i2c/* linux/drivers/media/i2c/
$ cp -rv beagle_devkit_camera_driver/arch/arm64/boot/dts/ti/* linux/arch/arm64/boot/dts/ti/ -
Build sources.
$ cd linux

# default configuration
$ make distclean
$ make ARCH=arm64 CROSS_COMPILE=aarch64-linux-gnu- bb.org_defconfig

# config camera
$ make menuconfig
# -> Device Drivers
#   -> Multimedia support (MEDIA_SUPPORT [=m])
#     -> Media ancillary drivers
#       -> Camera sensor devices (VIDEO_CAMERA_SENSOR [=y])
#         -> TechNexion TEVS sensor support
#            Set "VIDEO_TEVS" to module,
#            Press "m", save to original name (.config) and exit

# build kernel
$ make ARCH=arm64 CROSS_COMPILE=aarch64-linux-gnu- LOCALVERSION="-tn" -j$(nproc)
$ mkdir -p modules
$ sudo make ARCH=arm64 CROSS_COMPILE=aarch64-linux-gnu- INSTALL_MOD_PATH=./modules modules_install -
Plug in the SD card which burned "BeagleY-AI Debian 12.5 2024-06-19 XFCE" image to PC.
-
Configure sysconf.txt before the first boot.
$ vim /media/${user}/BOOT/sysconf.txt

> # root_password - Set a password for the root user (not used in ubuntu)
> root_password=root
>
> # user_name - Set a user name for the user (1000)
> user_name=beagle
>
> # user_password - Set a password for user (1000)
> user_password=beagle -
Install onto the SD card.
$ sudo cp arch/arm64/boot/Image /media/$(users)/BOOT/
$ sudo cp arch/arm64/boot/dts/ti/*.dtbo /media/$(users)/BOOT/overlays/

# you can use "make kernelversion" to check kernel version
$ sudo cp -ra modules/lib/modules/$(make kernelversion)-tn/ /media/$(users)/rootfs/lib/modules/
$ sync -
Boot BeagleY-AI with SD card.
-
Modify the extlinux.conf file to add camera configuraion.
$ sudo nano /boot/firmware/extlinux/extlinux.conf

> label microSD (default)
>     kernel /Image
>     append console=ttyS2,115200n8 root=/dev/mmcblk1p3 ro rootfstype=ext4 resume=/dev/mmcblk1p2 rootwait net.ifnames=0 quiet
>     fdtdir /
>     fdt /ti/k3-am67a-beagley-ai.dtb
>     fdtoverlays /overlays/k3-am67a-beagley-ai-csi0-tevs-rpi22.dtbo
>     initrd /initrd.img
Add the overlay to
label microSD (default)and appendfdtoverlays /overlays/k3-am67a-beagley-ai-csi0-tevs-rpi22.dtboafter thefdtline. -
Restart system.
$ sudo reboot
Bring up Camera by GStreamer
If you succeed in initialing the camera, you can follow the steps to open the camera.
-
Check the media deivce.
$ media-ctl -d /dev/media0 -p
Device topology
- entity 1: 30102000.ticsi2rx (7 pads, 7 links)
            type V4L2 subdev subtype Unknown flags 0
            device node name /dev/v4l-subdev0
        pad0: Sink
                [fmt:UYVY8_1X16/640x480 field:none colorspace:srgb xfer:srgb ycbcr:601 quantization:lim-range]
                <- "cdns_csi2rx.30101000.csi-bridge":1 [ENABLED,IMMUTABLE]
        pad1: Source
                [fmt:UYVY8_1X16/640x480 field:none colorspace:srgb xfer:srgb ycbcr:601 quantization:lim-range]
                -> "30102000.ticsi2rx context 0":0 [ENABLED,IMMUTABLE]
        pad2: Source
                -> "30102000.ticsi2rx context 1":0 [ENABLED,IMMUTABLE]
        pad3: Source
                -> "30102000.ticsi2rx context 2":0 [ENABLED,IMMUTABLE]
        pad4: Source
                -> "30102000.ticsi2rx context 3":0 [ENABLED,IMMUTABLE]
        pad5: Source
                -> "30102000.ticsi2rx context 4":0 [ENABLED,IMMUTABLE]
        pad6: Source
                -> "30102000.ticsi2rx context 5":0 [ENABLED,IMMUTABLE]

- entity 9: cdns_csi2rx.30101000.csi-bridge (5 pads, 2 links)
            type V4L2 subdev subtype Unknown flags 0
            device node name /dev/v4l-subdev1
        pad0: Sink
                [fmt:UYVY8_1X16/640x480 field:none colorspace:srgb xfer:srgb ycbcr:601 quantization:lim-range]
                <- "tevs 5-0048":0 [ENABLED,IMMUTABLE]
        pad1: Source
                [fmt:UYVY8_1X16/640x480 field:none colorspace:srgb xfer:srgb ycbcr:601 quantization:lim-range]
                -> "30102000.ticsi2rx":0 [ENABLED,IMMUTABLE]
        pad2: Source
        pad3: Source
        pad4: Source

- entity 15: tevs 5-0048 (1 pad, 1 link)
              type V4L2 subdev subtype Sensor flags 0
              device node name /dev/v4l-subdev2
        pad0: Source
                [fmt:UYVY8_1X16/640x480@1/60 field:none colorspace:srgb xfer:srgb ycbcr:601 quantization:full-range
                  crop.bounds:(0,0)/640x480
                  crop:(0,0)/640x480]
                -> "cdns_csi2rx.30101000.csi-bridge":0 [ENABLED,IMMUTABLE]

- entity 21: 30102000.ticsi2rx context 0 (1 pad, 1 link)
              type Node subtype V4L flags 0
              device node name /dev/video3
        pad0: Sink
                <- "30102000.ticsi2rx":1 [ENABLED,IMMUTABLE]

... -
List device support formats and resolutions.
# list support format
$ v4l2-ctl -d /dev/v4l-subdev2 --list-subdev-mbus-codes

ioctl: VIDIOC_SUBDEV_ENUM_MBUS_CODE (pad=0)
        0x200f: MEDIA_BUS_FMT_UYVY8_1X16

# list support frame size with format
$ v4l2-ctl -d /dev/v4l-subdev2 --list-subdev-framesize code=0x200f

ioctl: VIDIOC_SUBDEV_ENUM_FRAME_SIZE (pad=0)
        Size Range: 640x480 - 640x480
        Size Range: 1280x720 - 1280x720
        Size Range: 1280x800 - 1280x800

# list support frame intercal with format and resolution
$ v4l2-ctl -d /dev/v4l-subdev2 --list-subdev-frameintervals \
pad=0,width=1280,height=720,code=0x2006

ioctl: VIDIOC_SUBDEV_ENUM_FRAME_INTERVAL (pad=0)
Interval: 0.017s (60.000 fps) -
Bring up the camera (/dev/video3) with 640x480 by Gstreamer pipeline.
$ DISPLAY=:0 gst-launch-1.0 v4l2src device=/dev/video3 ! \
"video/x-raw, format=UYVY, width=640, height=480" ! fpsdisplaysink sync=false -
Change resolution with 1280x720 and bring up by Gstreamer pipeline directly.
# modify media resoltion
media-ctl -V '"tevs 5-0048":0 [fmt:UYVY8_1X16/1280x720]'
media-ctl -V '"30102000.ticsi2rx":0 [fmt:UYVY8_1X16/1280x720]'

$ DISPLAY=:0 gst-launch-1.0 v4l2src device=/dev/video3 ! \
"video/x-raw, format=(string)UYVY, width=(int)1280, height=(int)720" ! \
fpsdisplaysink video-sink=glimagesink sync=false