AVerMedia D133OXB with JetPack 6.1
Instruction
TechNexion Embedded Vision Solutions provide embedded system developers access to high-performance, industrial-grade camera solutions to accelerate their time to market for embedded vision projects.
Supported Camera Modules
| Camera Series | Products |
|---|---|
| VLS-GM2 | VLS-GM2-AR0144 VLS-GM2-AR0145 VLS-GM2-AR0234 VLS-GM2-AR0235 VLS-GM2-AR0246 VLS-GM2-AR0521 VLS-GM2-AR0522 VLS-GM2-AR0544 VLS-GM2-AR0821 VLS-GM2-AR0822 VLS-GM2-AR0830 VLS-GM2-AR1335 VLS-GM2-AR2020 |
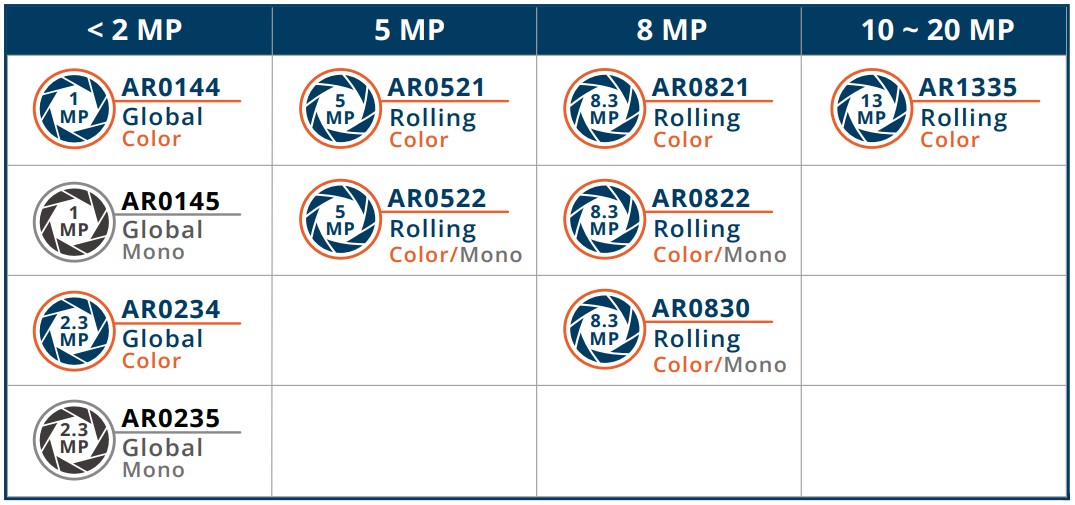
More Camera Products Details...
If you want to use the TEVS camera, please refer to another guide.
Supported NVIDIA Jetson Partner Platforms
Install TN Camera on NVIDIA Jetson Partner Platforms
Connect to NVIDIA Jetson Partner Platforms
VL-GM2-8CAM-RPI22 adaptor for VLS-GM2 cameras
Connect VL-GM2-8CAM-RPI22 adaptor to D133OXB directly.
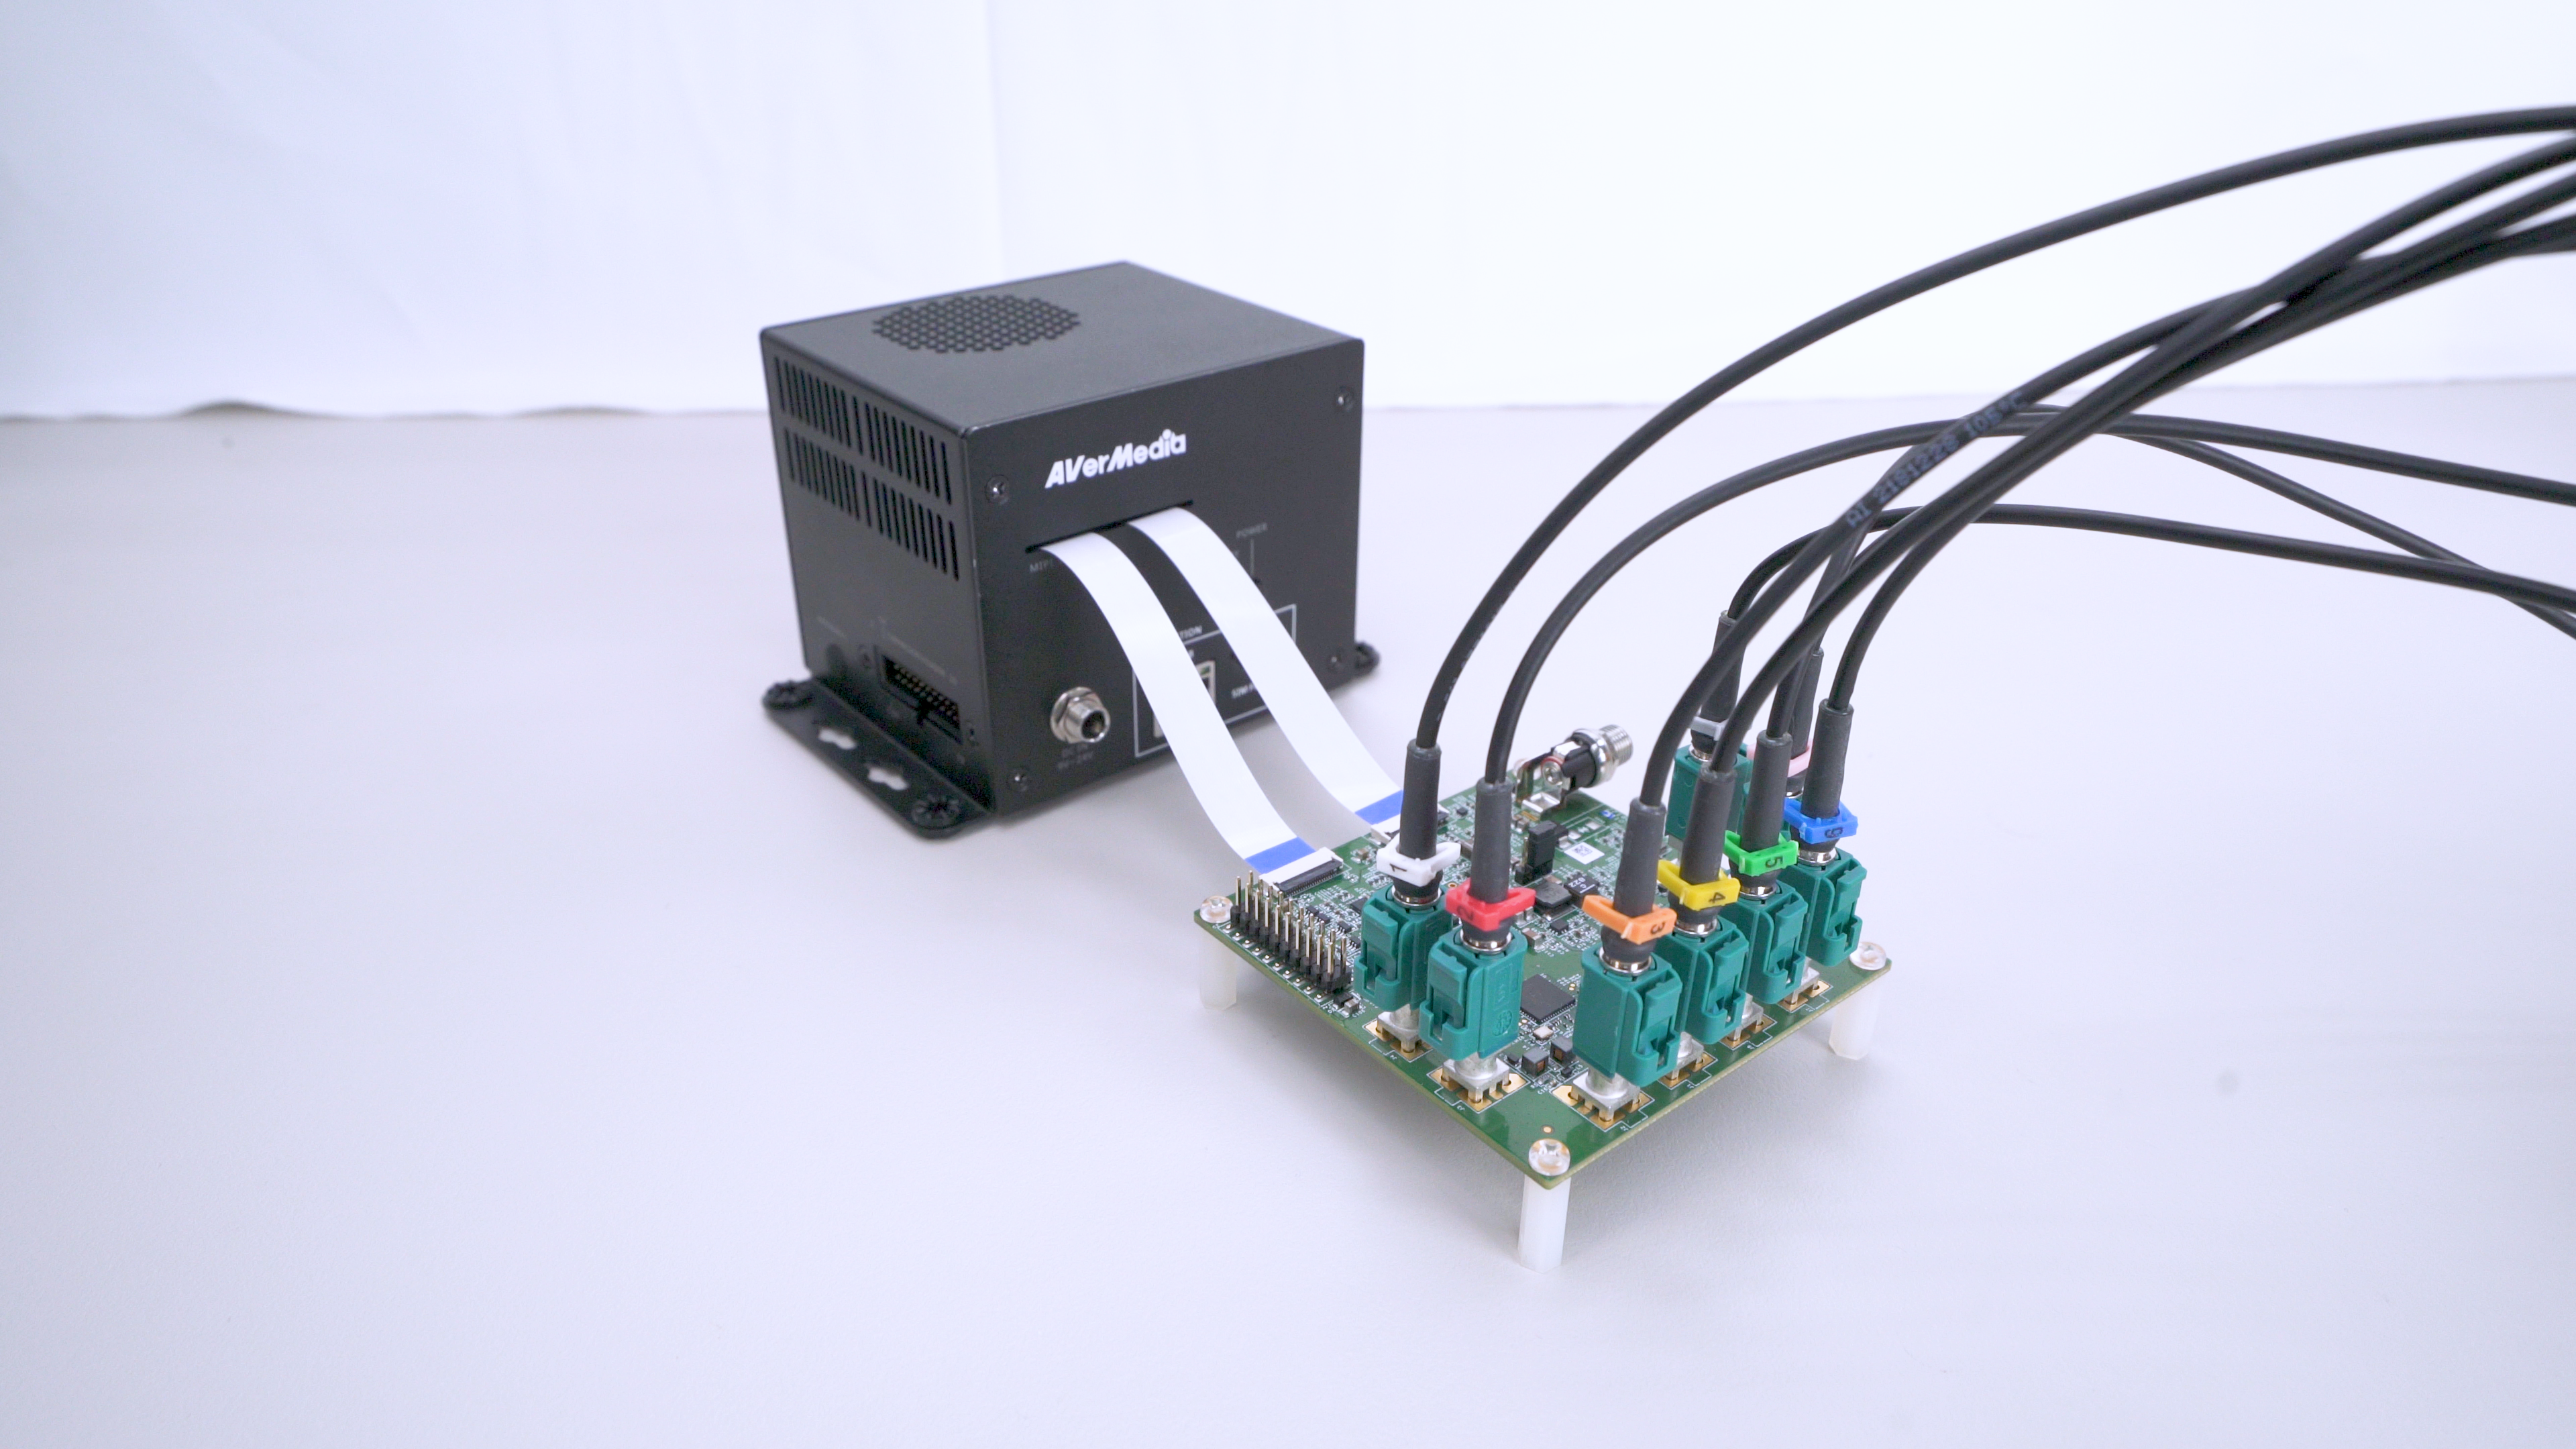
Follow the video tutorial below to learn how to connect VL-GM2-8CAM-RPI22 adapter and VLS-GM2 cameras to D133OXB.
Using TechNexion Pre-built modules
We recommend following the user manual from platform vendors to setup system. After that, you can follow the below method to install TechNexion Cameras Driver.
-
Download pre-built modules.
$ wget https://download.technexion.com/demo_software/EVK/NVIDIA/D133OXB/pre-built-modules/latest/JP61/tn_camera_modules_jp61.tar.gz -
Uncompress the modules.
$ tar -xf tn_camera_modules_jp61.tar.gz -
Run installation script.
$ cd tn_camera_modules_<built_time>/
$ sudo ./tn_install.sh -
After you agree to continue the installation, the module will be installed to the system.
$ sudo ./tn_install.sh
****** TechNexion Camera Driver Installation ******
This installer updates TechNexion camera drivers, camera DTBOs,
and boot entries for NVIDIA Jetson Development Kits.
Back up your image before continuing.
Continue? [Y/n] Y
Camera module:
  [1] TEVS - TEVS Series MIPI Cameras with TEV-RPI22 Adaptor
  [2] VLS-GM2 - VLS-GM2 Series Cameras with VL-GM2-8CAM-RPI22 Adaptor
Select camera module [1-2] (default: 1): 2
Reboot after installation? [y/N] n
Installing D133OXB JP61
Selected module: VLS-GM2
Installation summary:
  Kernel: 5.15.148-tegra
  Modules installed: 4
  Boot files installed: 6
  Default boot entry: vls-gm2
  Camera overlay: /boot/tegra234-p3768-camera-d133oxb-vls-gm2-overlay.dtbo
  Camera boot entries: 4
Finish Camera Driver Installation.
Reboot the device when the user is ready.
You should reboot the device after installation.
Bring up Camera
TechNexion VizionViewer
Gstreamer
If you succeed in initialing the camera, you can follow the steps to open the camera.
-
Check the supported resolutions:
$ gst-device-monitor-1.0 Video/Source
Probing devices...

Device found:

        name  : vi-output, tevs 9-0039
        class : Video/Source
        caps  : video/x-raw, format=UYVY, width=640, height=480, framerate=60/1
                video/x-raw, format=UYVY, width=1280, height=720, framerate=60/1
                video/x-raw, format=UYVY, width=1280, height=800, framerate=60/1
                video/x-raw, format=NV16, width=640, height=480, framerate=60/1
                video/x-raw, format=NV16, width=1280, height=720, framerate=60/1
                video/x-raw, format=NV16, width=1280, height=800, framerate=60/1
                video/x-raw, format=UYVY, width=640, height=480, framerate=60/1
                video/x-raw, format=UYVY, width=1280, height=720, framerate=60/1
                video/x-raw, format=UYVY, width=1280, height=800, framerate=60/1
        properties:
                object.path = v4l2:/dev/video0
                device.api = v4l2
                media.class = Video/Source
                api.v4l2.path = /dev/video0
                api.v4l2.cap.driver = tegra-video
                api.v4l2.cap.card = "vi-output\,\ tevs\ 9-0039"
                api.v4l2.cap.bus_info = platform:tegra-capture-vi:0
                api.v4l2.cap.version = 5.15.148
                api.v4l2.cap.capabilities = 84200001
                api.v4l2.cap.device-caps = 04200001
                device.id = 34
                node.name = v4l2_input.platform-tegra-capture-vi
                node.description = "vi-output\,\ tevs\ 9-0039"
                factory.name = api.v4l2.source
                node.pause-on-idle = false
                factory.id = 10
                client.id = 32
                clock.quantum-limit = 8192
                media.role = Camera
                node.driver = true
                object.id = 35
                object.serial = 35
        gst-launch-1.0 pipewiresrc path=35 ! ...

... -
Use the Gstreamer pipeline to launch a 1280x720 resolution camera (/dev/video0) via the CPU:
$ DISPLAY=:0 gst-launch-1.0 v4l2src device=/dev/video0 ! \
"video/x-raw, format=UYVY, width=1280, height=720" ! xvimagesink sync=false -
Use the Gstreamer pipeline to launch a 1280x720 resolution camera (/dev/video0) via the GPU:
$ DISPLAY=:0 gst-launch-1.0 nvv4l2camerasrc device=/dev/video0 ! \
"video/x-raw(memory:NVMM), format=UYVY, width=1280, height=720" ! \
nvvidconv ! nv3dsink sync=false
Troubleshooting
Cannot find cameras
If you cannot bring up the cameras, you can check if the video device does exist.
$ ls /dev/video*  # List all video devices
/dev/video0  /dev/video1
If you cannot see the devices, you should check if the drivers have been probed.
Occur Error: Could not get EGL display connection
If you occurred the errors nvbufsurftransform: Could not get EGL display connection by rununing the Gstreamer command, you can modify the parameter DISPLAY by the command:
# Check and Set environment parameter for 'DISPLAY'
$ export DISPLAY=$(w| tr -s ' '| cut -d ' ' -f 3 | grep :)

# Run Gstreamer pipeline
$ gst-launch-1.0 v4l2src device=/dev/video0 ! \
"video/x-raw, format=UYVY, width=1280, height=720" ! xvimagesink sync=false
no element "nvv4l2camerasrc"
If you encounter the following error:
WARNING: erroneous pipeline: no element "nvv4l2camerasrc"
This means your system is missing some NVIDIA GPU-related plug-in tools. You have to install some NVIDIA plug-in tools for Gstreamer.
$ sudo apt update && apt depends nvidia-jetpack | awk '{print $2}' | uniq | xargs -I {} bash -c "sudo apt -o Dpkg::Options::="--force-confold" -y install {} ; sudo apt clean"