Usage Guide
- 22 Apr 2025
- 5 Minutes to read
- Print
- DarkLight
- PDF
Usage Guide
- Updated on 22 Apr 2025
- 5 Minutes to read
- Print
- DarkLight
- PDF
Article summary
Did you find this summary helpful?
Thank you for your feedback!
Introduction
Using VizionViewer™, you can perform the following:
- Enumerate and list all video devices connected.
- Change color space / compression, resolution and framerate for video stream.
- Display the current frame rate per second.
- Timestamp and Frame Count.
- Configure Extension Settings control, if supported by device.
- Set up AGC exposure mode to keep the framerate constant.
- Limit Exposure Range in Auto Exposure Mode.
- Update Technexion cameras firmware.
- Set up OS profiles to save preferred video stream settings and extension settings.
- Set up OSP profile to save preferred video stream settings and extension settings to sensor.
- Record videos and take photos.
- Picture-in-Picture(PiP) mode for streaming preview.
- Camera Simulation.
- Focus Mode.
Enumerate and list all video devices
The device list updates every second, and you can select a camera from the dropdown menu.

Change streaming format
Change color space / compression
After selecting a camera, the dropdown menu for color space / compression displays supported formats for the camera.
VizionViewer™ supports UYVY, YUY2, NV12, and MJPG color space / compression.
Change resolution
After selecting color space / compression setting, the dropdown menu for resolution will list the resolutions supported by the camera.
Change framerate
After selecting resolution, the dropdown menu for framerate displays supported framerates for the camera.
Display the current frame rate per second
Note: "Stream Frame Rate" refers to the camera's streaming output rate, not the rendering rate of VizionViewer™.

Timestamp and Frame Count
When clicking the ⦿ icon, VizionViewer will retrieve the Timestamp and Frame Count for each captured image.
- Timestamp is recorded in seconds with millisecond precision (e.g.,
12.345). - Framecount is an 8-bit counter that resets to
0after reaching255.
When clicking the ⟲ icon, both Timestamp and Frame Count will reset to 0.

Extension Settings control
Note: When the Control Mode is switched to UVC, ISP Extension settings will automatically default. Conversely, switching to ISP mode will set UVC Extension settings to default.

Configure Extension Settings control in UVC Mode
VizionViewer™ supports the following extensions in UVC Mode:
- White Balance - Auto / Manual
- Exposure / Gain - Auto / Manual
- Contrast
- Saturation
- Sharpness
- Gamma
- Brightness
- Hue
- Backlight
- Focus
- Iris
- Zoom
- Pan
- Tilt
- Roll
Configure Extension Settings control in ISP Mode
VizionViewer™ supports the following extensions in ISP Mode:
- White Balance - Auto / Manual
- Exposure / Gain - Auto / AGC / Manual
- Contrast
- Saturation
- Sharpness
- Gamma
- Noise
- Brightness
- Mjpg Quality
- Filter
- Flick Mode
- Zoom
- Pan
- Tilt
- Flip
Set up AGC exposure mode to keep the framerate constant
Floating framerate
Due to the product feature "Designed for Low Light Applications", the camera will increase exposure time in automatic exposure mode to maintain image quality in low-light environments.
You can switch the camera to AGC exposure mode to keep the framerate constant.
AGC mode
Auto gain control, Manual exposure time
When switching to AGC mode, the gain becomes automatic, and the initial exposure value will change based on the current streaming framerate to keep the framerate constant.

Limit Exposure Range in Auto Exposure Mode
(Default Exposure Range) When switching to Auto Exposure Mode, the Exposure Time Range is automatically set to the default range based on the selected streaming format.
You can limit the exposure range even in Auto Exposure Mode. This is useful when you want to avoid overexposure or motion blur in specific lighting conditions.
The default exposure range varies depending on the selected resolution and framerate.
When hovering over the ± icon, the current Exposure Time and Exposure Gain values will be shown in a tooltip. These values are updated every second to reflect real-time changes.

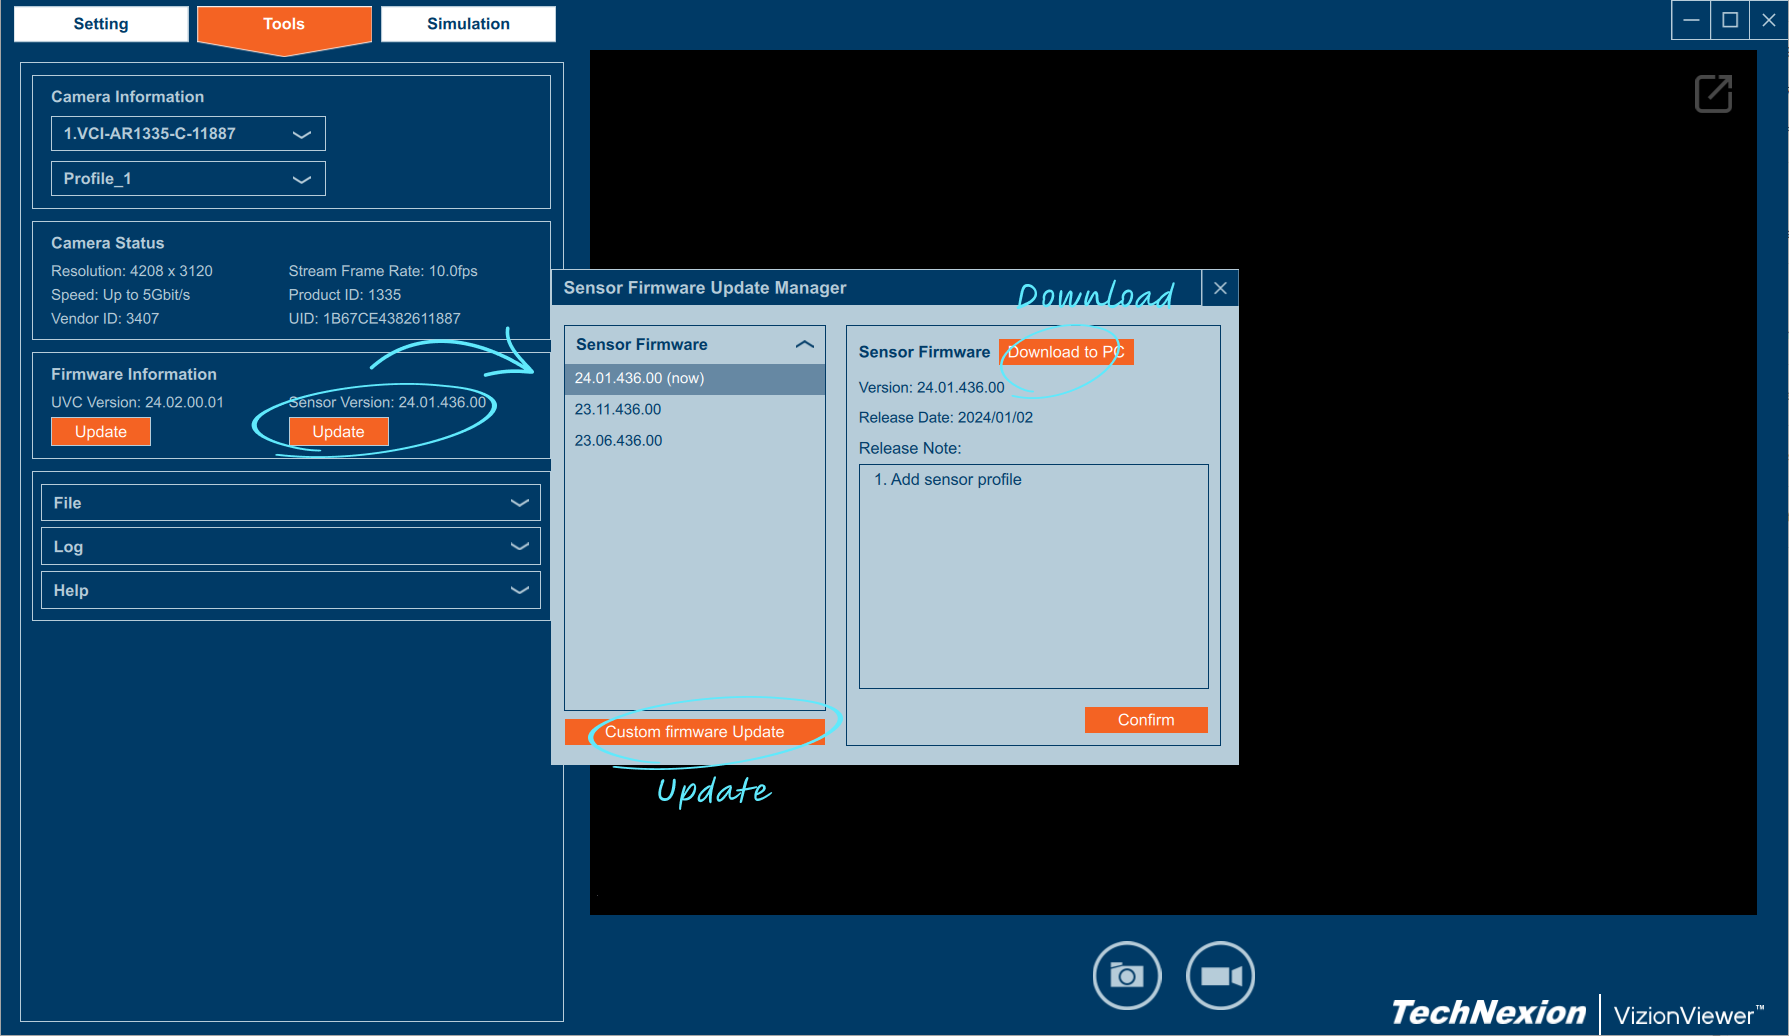
Update Technexion cameras firmware
When a selected camera has firmware available on the technexion server, the "Update" button will become enabled, allowing you to select the desired version update or download.
- Update your camera's firmware directly
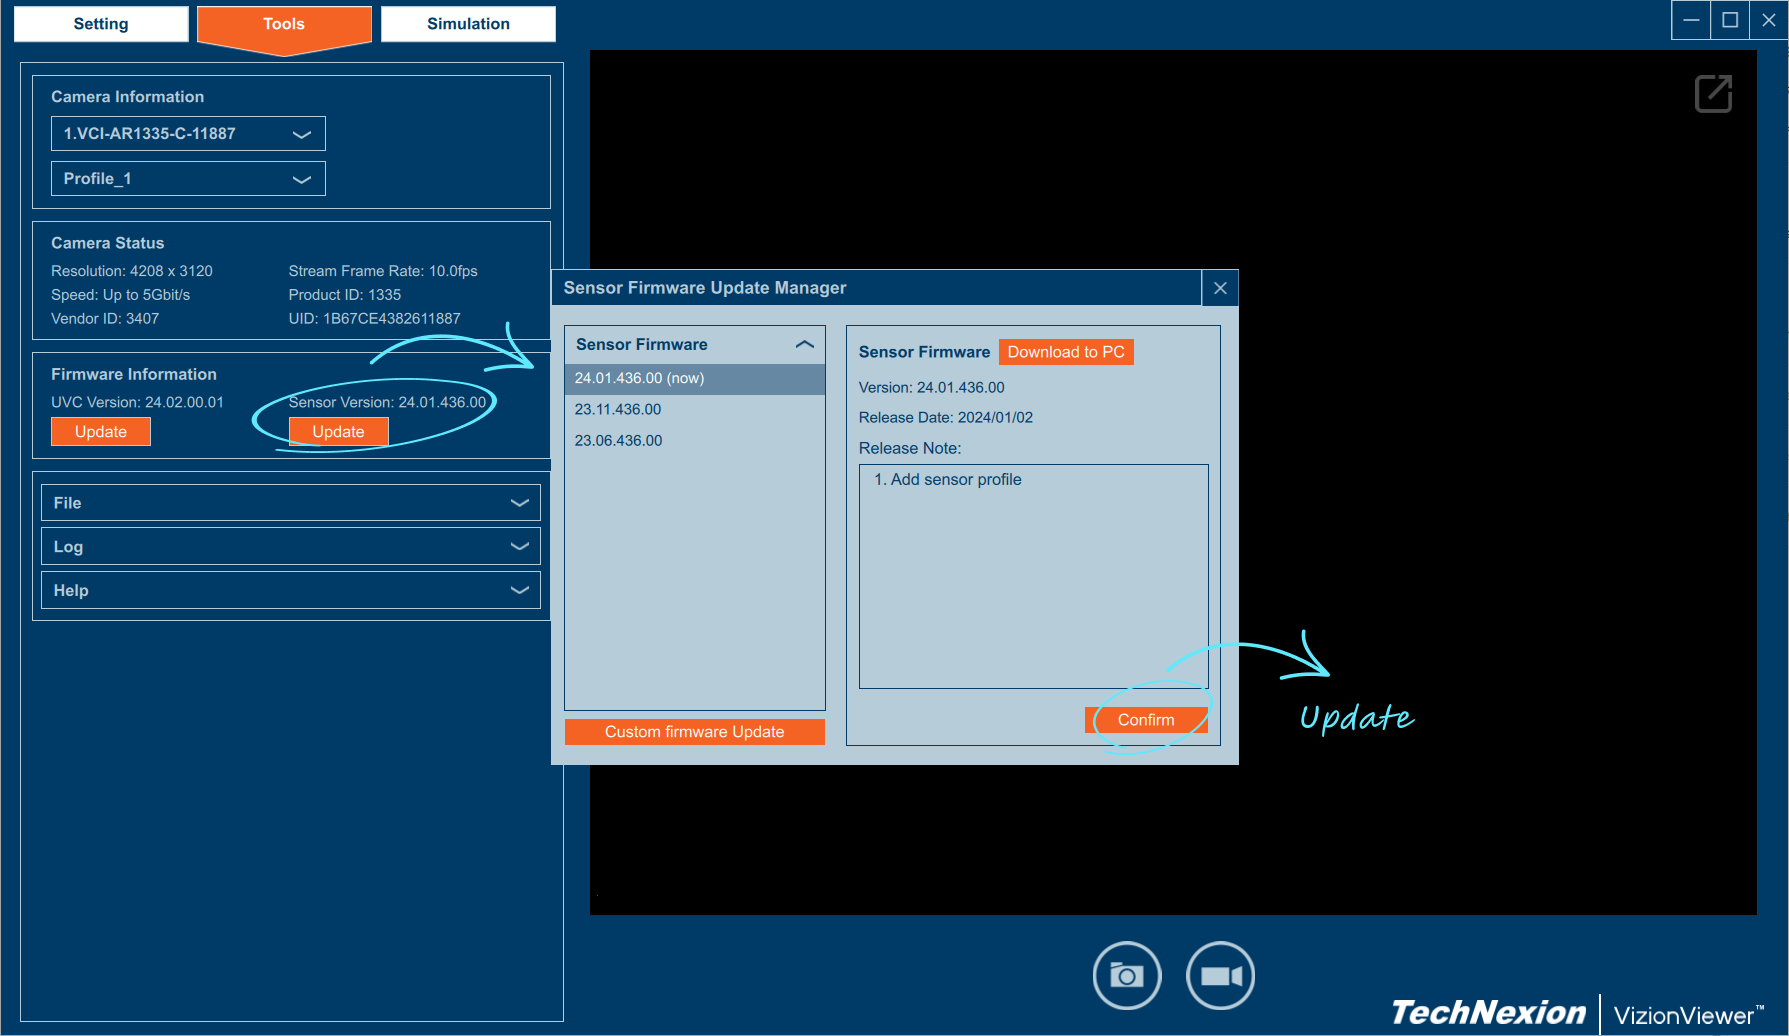
- Download firmware to update camera on computer later


Set up OS profiles
The profile feature allows you to save video stream settings and extension settings for your camera.
You can create multiple profiles and give them names, making it easy to apply predefined configurations in different scenarios.

Set up OSP(On Sensor Profile) profile
You can store profile directly on the sensor. The camera will automatically apply your preset profile as soon as it turns on.

Record videos and take photos
Record videos
- Video recordings are saved in H.264 encoding, Hardware configurations may affect video framerate.
- Videos are saved with filenames in the format: {yyyyMMdd_hh_mm_ss_zzz}.avi
- The video storage location is the system default path (Tools -> File -> Open Video Folder).
- You can change the video storage location by going to Tools -> File -> Options.
Take photos
- Photos are saved with filenames in the format: {yyyyMMdd hh_mm_ss_zzz}.png
- The image storage location is the system default path (Tools -> File -> Open Image Folder)
- You can change the image storage location by going to Tools -> File -> Options.
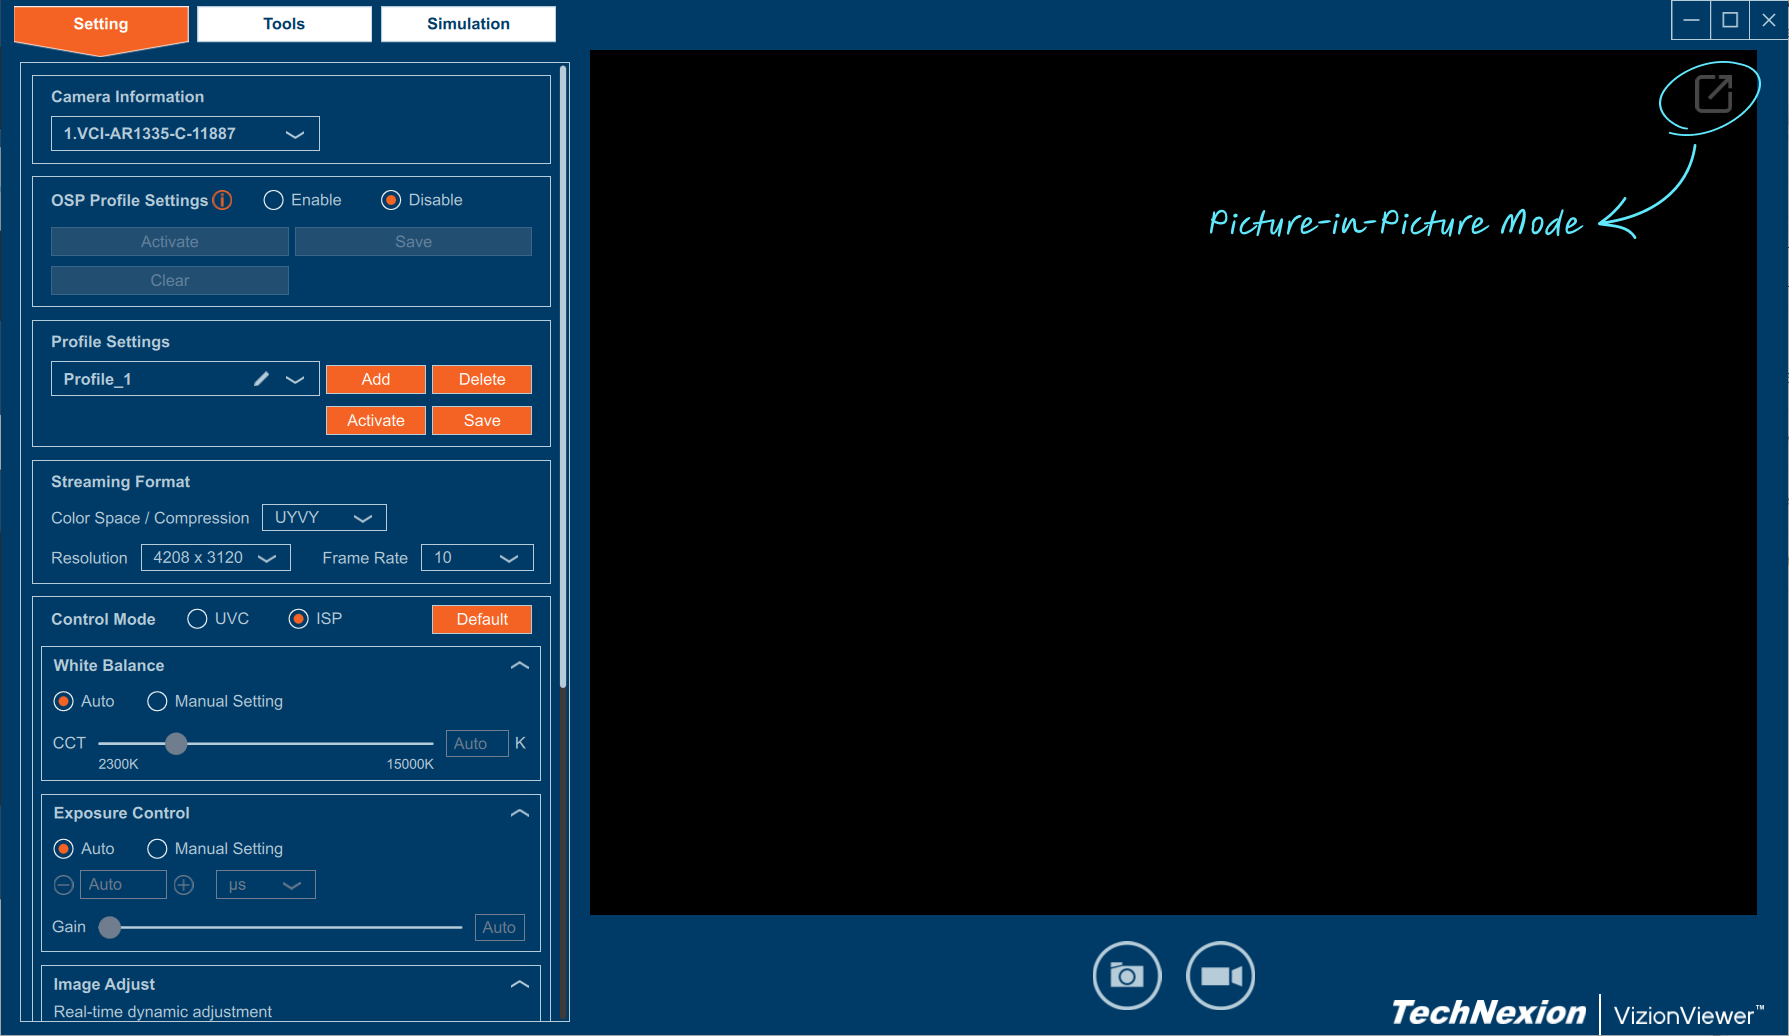
Picture-in-Picture mode
PiP mode allows you to focus more on image composition
- Double-click on the screen or press F11 in PiP mode to enlarge the screen to full-screen mode
- Double-click on the PiP window title bar to windowed full-screen mode.

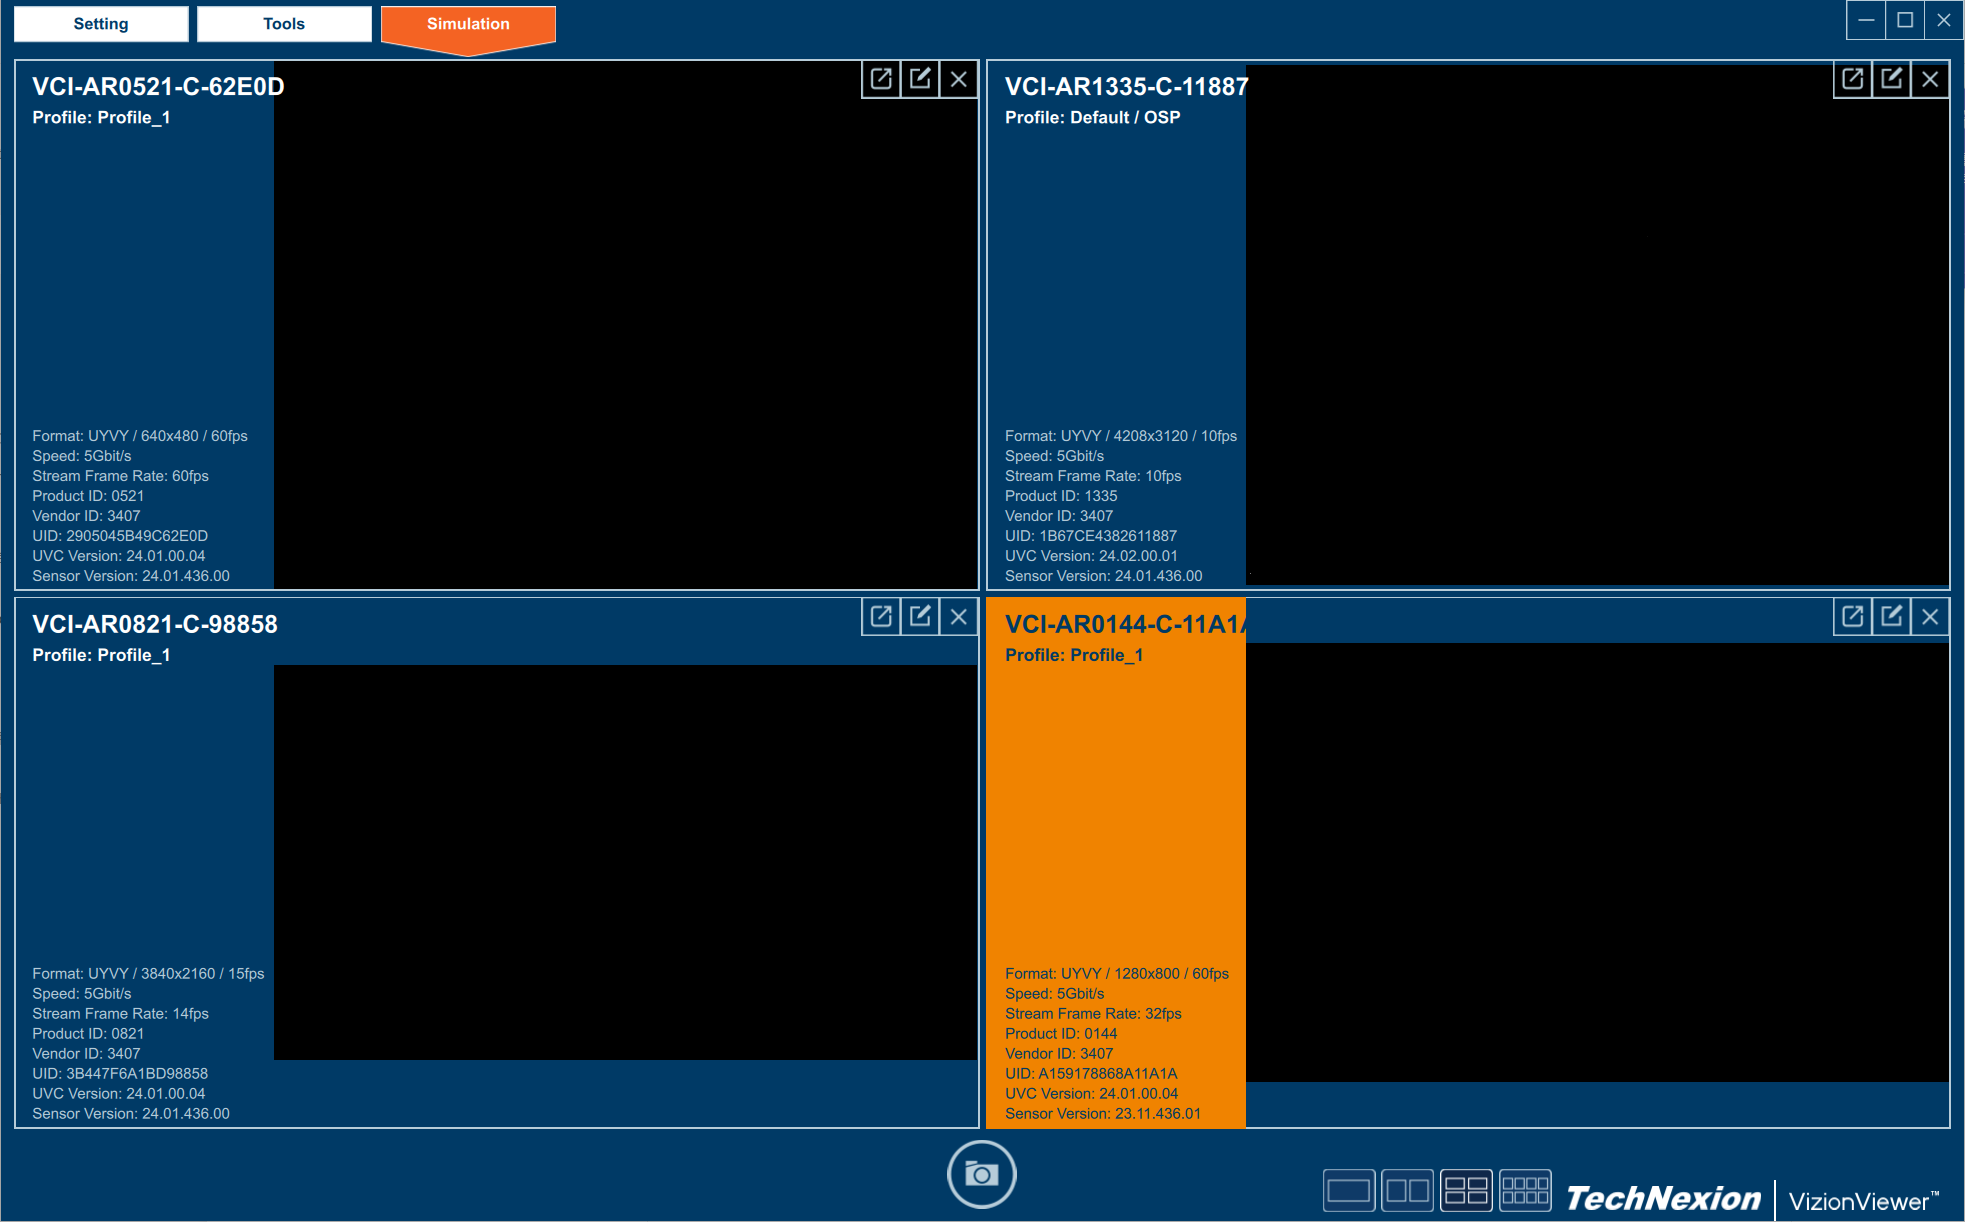
Camera Simulation
- View Multiple Cameras at Once: Observe images from up to eight cameras simultaneously.
- Real-Time Alerts for Frame Rate Drops: If the frames per second dip below 75% or 50% of the expected rate, you’ll get an instant alert.

Focus Mode
Impact on Performance
Enabling Focus Mode may affect the streaming framerate (FPS).
Focus Mode provides tools to evaluate the sharpness of the image based on selected algorithms:
- Tenengrad: Captures horizontal and vertical edges, delivering stable focus evaluation for texture-rich images, with moderate sensitivity to noise and higher computational cost.
- Laplacian: Enables multi-directional edge detection and is well-suited for global focus assessment, though it is highly sensitive to noise and minor variations.
- Brenner: A fast, efficient method targeting horizontal edges, but limited in directional sensitivity and less effective in capturing fine details.
Once enabled, the streaming preview on the right will display:
- A Focus ROI (Region of Interest) overlay.
- The calculated Focus Value for the selected region.
You can adjust the ROI size using the ROI Size setting, and click directly on the streaming preview to reposition the focus ROI.
Environment Consistency
For accurate comparison, it is recommended to use Focus Mode under consistent lighting and scene conditions.

Support
If you encounter any difficulties using VizionViewer™, please navigate to Tools -> Help -> Report Issue.
- Export the VizionViewer™ report.
- Add the VizionViewer™ report to the attached file.
- Describe what issue have you encountered.
- Sent to support.vision@technexion.com.
Was this article helpful?