- 22 Jul 2024
- 2 Minutes to read
- Print
- DarkLight
- PDF
Using 'uuu' to flash QSPI
- Updated on 22 Jul 2024
- 2 Minutes to read
- Print
- DarkLight
- PDF
Introduction
This article takes you through the process to load QSPI of u-boot with the Universal Update Utility or uuu.
Most of the steps are the same as flash e.MMC except the Run(-b) option is setting to qspi.
Supported platforms
- TEK-IMX8MP
- TEP-IMX8MP
Those platform use QSPI to store the u-boot image and environment.
Once enter the u-boot prompt, it will try to boot to OS stored in e.MMC.
Depend on the condition, you might want to flash the e.MMC image as well.
Obtain and install the 'uuu' tool
There are several ways that you can obtain the 'uuu' tool. You can download prebuilt versions of it, or you can build it from source.
Fetch a prebuilt binary from TechNexion's download site
Prebuilt binaries of uuu can be download from TechNexion's download site
These are conveniently packaged with boot images for most of our platforms as well.
Clone "uuu" on TechNexion github
You can clone the source for 'uuu' from our github repository.
https://github.com/TechNexion/imx-mfgtools-tn
Please follow the README within the repository to build the tool from source.
For more information about how to use uuu, please refer to UUU.pdf in the link above.
Use uuu to flash QSPI image under Linux
- Install required packages for running mfgtool (
uuu). The following command will install them onto an Ubuntu host machine.
sudo apt-get install libusb-1.0-0-dev libbz2-dev libzstd-dev pkg-config cmake libssl-dev g++ zlib1g-dev libtinyxml2-dev
Left device disconnect the power, connect USB Type-C peripheral cable to the board, and the other end to the host PC. Press and hold the S1 button and plug the power cable, then release the S1 button.
Locate the image you want to flash. This will usually has name of
*fspi_u-boot.binExecute
uuuto start flashing process.
cd imx-mfg-uuu-tool
# sudo ./uuu/linux64/uuu -b qspi <fspi_u-boot.bin>
sudo ./uuu/linux64/uuu -b qspi imx8mp/tek-imx8mp/tek-imx8mp-fspi_u-boot.bin

- Once the flash process completes, power off the board, and re-power on it. You will see theu-boot image is changed.
Use uuu to Flash QSPI Images Under Microsoft Windows
Left device disconnect the power, connect USB Type-C peripheral cable to the board, and the other end to the host PC. Press and hold the S1 button and plug the power cable, then release the S1 button.
Locate the image you want to flash. This will usually has name of
*fspi_u-boot.binRun
Windows Powershellorcmdwith administrator permission.Run
uuuto start flashing process:
cd imx-mfg-uuu-tool
#  .\uuu\windows64\uuu.exe -b qspi <fspi_u-boot.bin>
.\uuu\windows64\uuu.exe -b qspi imx8mp\tek-imx8mp\tek-imx8mp-fspi_u-boot.bin

- Once the flash process completes, power off the board, and re-power on it. You will see theu-boot image is changed.
Troubleshooting:
- After starting
uuu, the board should enter tofastbootmode and wait for request from host PC:

- If it stops in
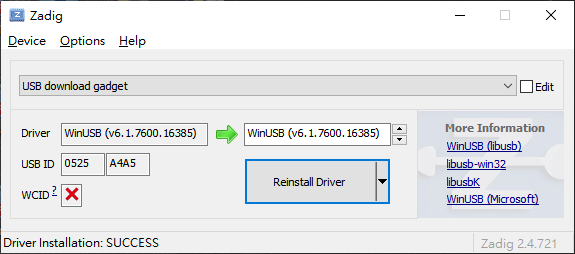
fastbootmode, you might need to install USB driver under MS Windows. Please refer toUse zadig to install winusb driverchapter inUUU.pdfin MFGtool github.

- Enter shell mode is helpful to check
uuufails on what step. Add-sto enter shell mode. uuu.inputlog record all input commands you can use "uuu uuu.inputlog" next time to run all commands


