- 24 Mar 2025
- 2 Minutes to read
- Print
- DarkLight
- PDF
TechNexion TEVS Camera for AAEON Up Squared Pro 7000
- Updated on 24 Mar 2025
- 2 Minutes to read
- Print
- DarkLight
- PDF
Introduction
This article will explain how to enable the TechNexion TEVS Cameras on the AAEON Up Squared Pro 7000. It will cover the necessary steps and configurations to ensure proper integration and functionality of the TEVS Camera with the Up Squared Pro 7000 platform.
Hardware Installation Instruction
Supported Cameras List
| Camera Series | Products |
|---|---|
| TEVS | TEVS-AR0144 TEVS-AR0145 TEVS-AR0234 TEVS-AR0521 TEVS-AR0522 TEVS-AR0821 TEVS-AR0822 TEVS-AR1335 |
Connect TEVS Cameras
Please follow the image below to install the TEVS Cameras. Make sure to pay close attention to the installation direction of the camera cables to ensure it is correctly oriented.

Software Installation Instruction
BIOS Configurations
You need to configure the camera settings in the BIOS first. Please follow the steps below:
- Press the del key during startup to enter the BIOS. The default password is
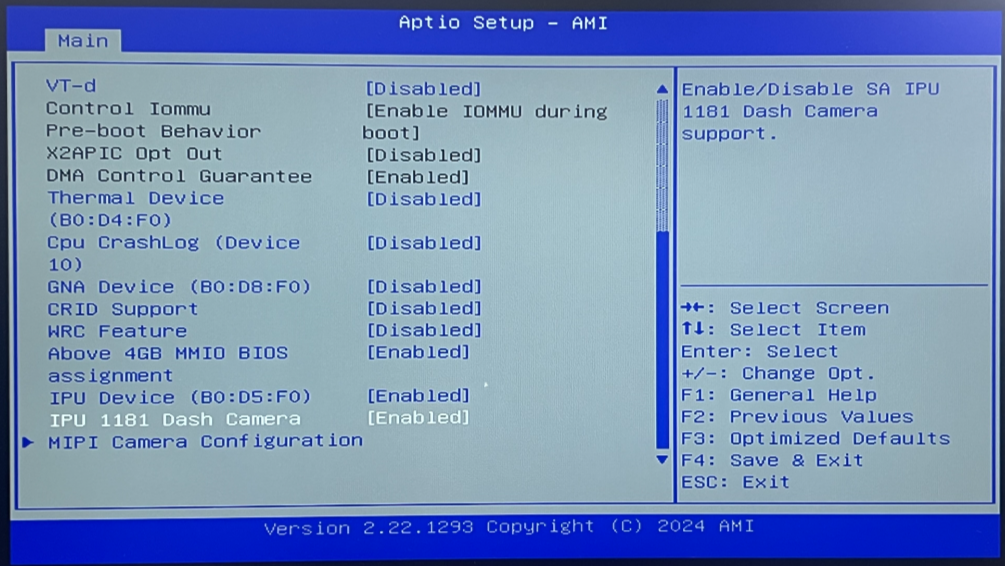
upassw0rd. - Navigate to CRB Setup --> CRB Chipset --> System Agent (SA) Configuration. Disable VT-d, then enable IPU Device(B0:D5F0), and IPU 1181 Dash Camera as shown in image below.
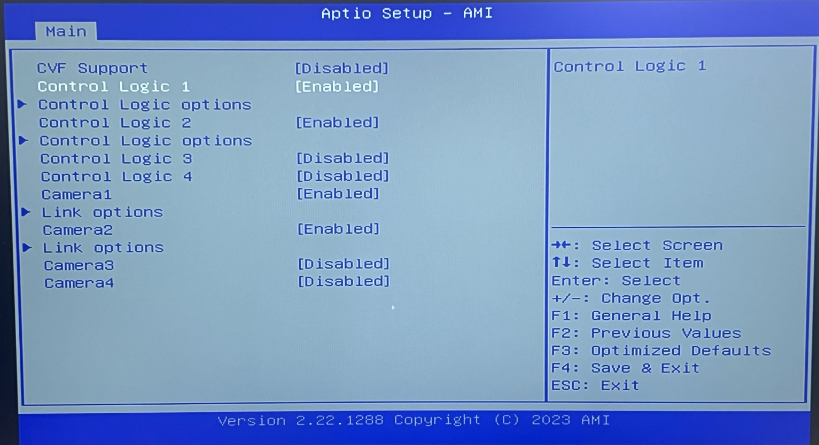
- Navigate to MIPI Camera Configuration. Enable Conctrol Logic 1, Control Logic 2, Camera1, and Camera2 as shown in image below.
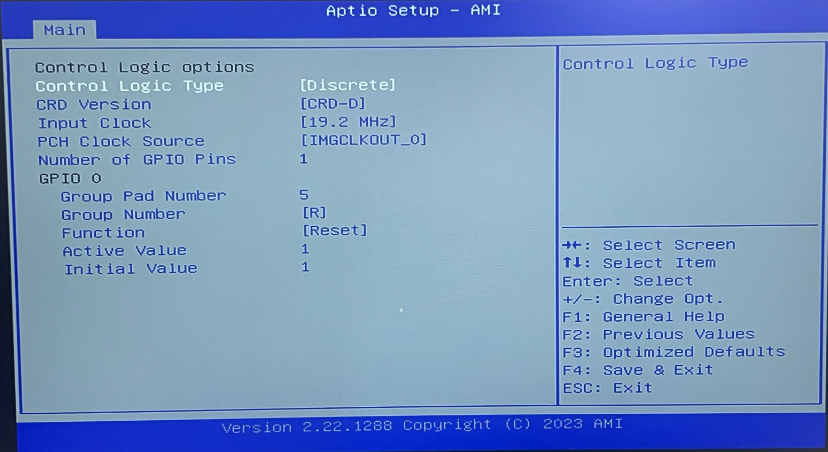
- Navigate to Control Logic options below Control Logic 1 and configure the settings as shown in image below.
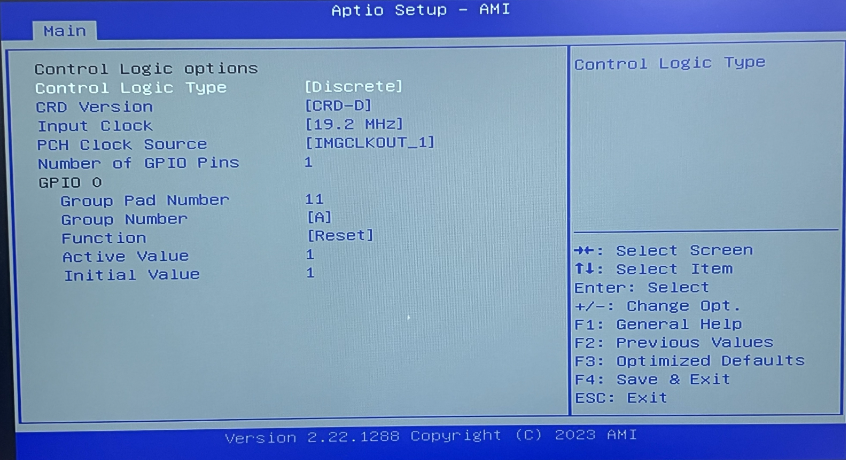
- Navigate to Control Logic options below Control Logic 2 and configure the settings as shown in image below.
- Navigate to Link options below Camera1 and configure the settings as shown in image below.
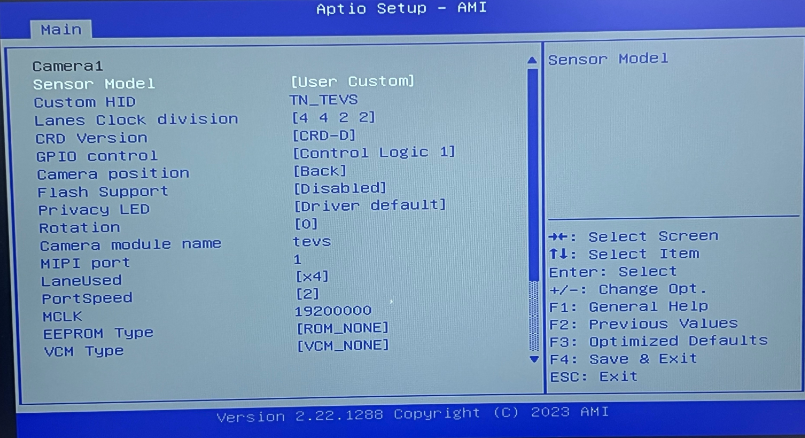
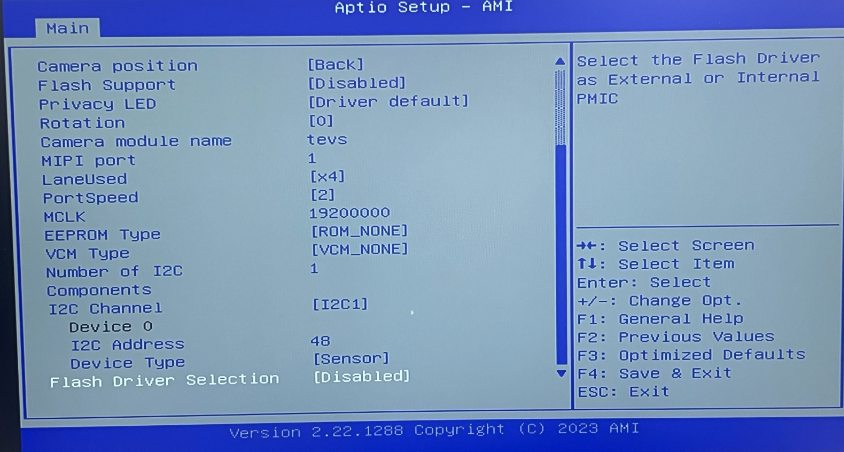
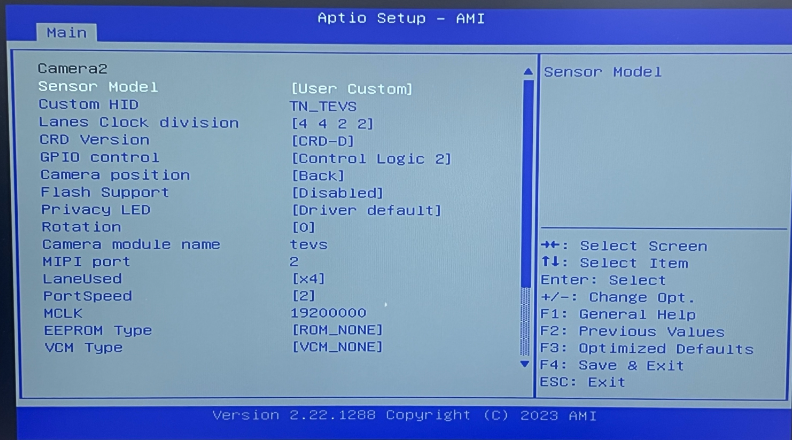
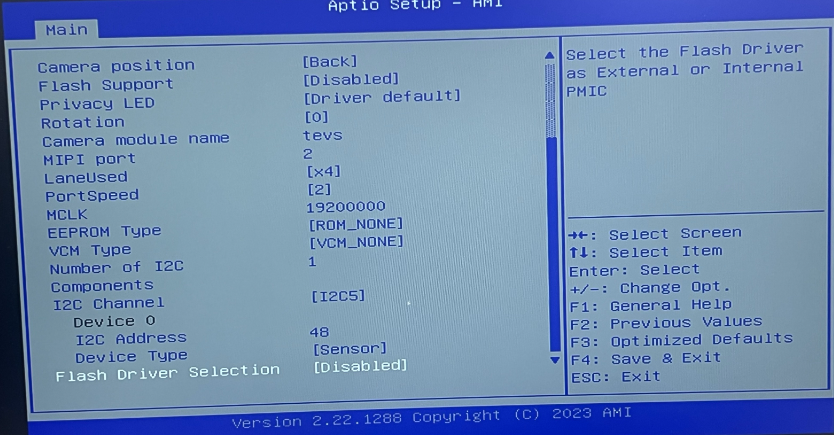
- Navigate to Link options below Camera2 and configure the settings as shown in image below.
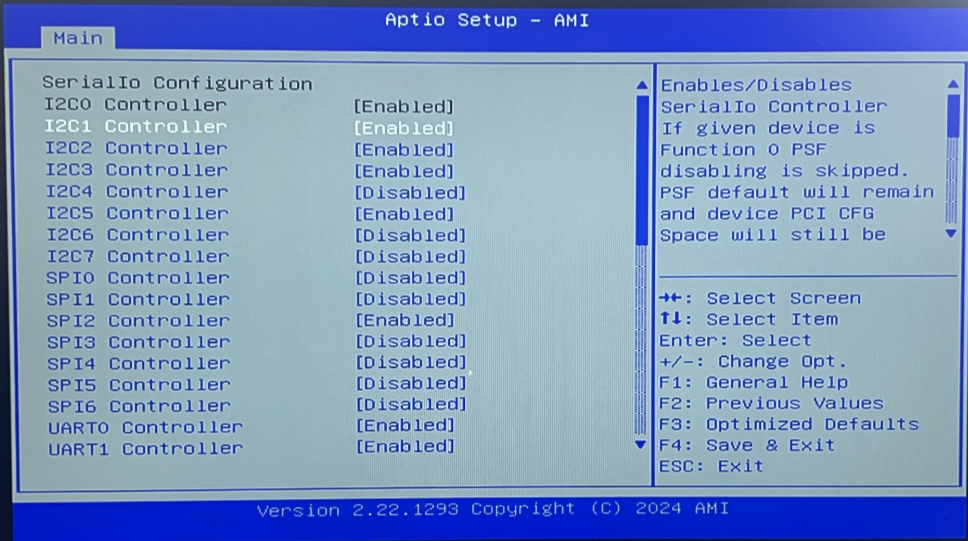
- Return to main menu, then navigate to CRB Setup --> CRB Chipset --> PCH-IO Configuration --> SerialIo Configuration. Enable I2C1 Controller and I2C5 Controller as shown in image below.
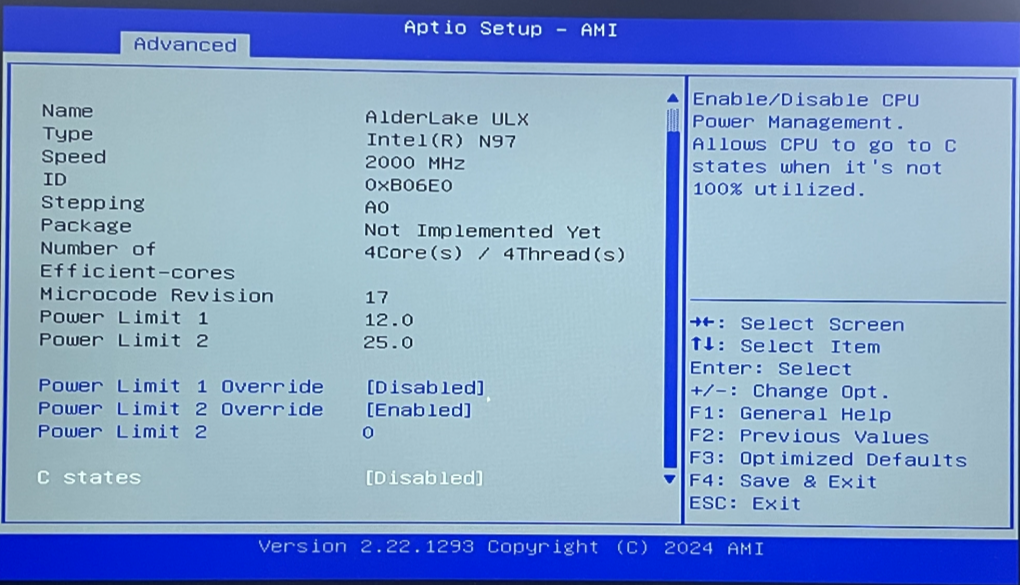
- Return to main menu, then select Advanced tab, and navigate to CPU Configuration. Disabled C states as shown in image below.
- After completing the above settings, press F4 to save the new configuration and restart the device.
OS Configurations
We need to install Ubuntu 22.04, using the image for the Intel IoT platforms. You can download it from the following website.
Ubuntu for Intel IoT platforms
Camera Drivers Installation
The default kernel version for Ubuntu 22.04 is 5.15. After installing this drivers, the kernel version will be updated to 6.6.
After installing and setting up Ubuntu 22.04, please follow the steps below to complete the Camera Driver installation.
- Before installing the camera driver packages, you need to install the necessary GStreamer packages to ensure the camera can be properly enabled.
sudo apt update
sudo apt upgrade -y
sudo apt-get install libgstreamer1.0-0 gstreamer1.0-plugins-base gstreamer1.0-plugins-good gstreamer1.0-plugins-bad gstreamer1.0-plugins-ugly gstreamer1.0-libav gstreamer1.0-tools libgstreamer-plugins-base1.0-dev
- Download the driver packages to the device.
Download Driver Packages
You can use the following command to download the packages:
wget https://download.technexion.com/demo_software/EVK/Intel/AAEON/UpBoard/packages/intel-cam-setup.tar.gz
- Next, extract the file and run the
install.shscript to install the camera driver packages.
tar xf intel-cam-setup.tar.gz
cd intel-cam-setup/
./install.sh
- After the installation is complete, reboot the device and make sure the kernel version is updated to
6.6.44--000after reboot.
$ uname -r
6.6.44--000
Enable Cameras
There is a test script to easily enable the cameras.
cd intel-cam-setup/test/
./launch_video_pipeline.sh  # run the command to enable cameras
By default setting, it will enable TEVS-AR0144 with a resolution of 640x480.
If you want to enable other cameras or resolutions you can run the following command:
./launch_video_pipeline.sh <cam_type> <resolution>
For example:
- Enable TEVS-AR0234 on CAM1 with resolution 1920x1080:
./launch_video_pipeline.sh tevs-ar0234 1920x1080
- Enable TEVS-AR0521 on CAM2 with resolution 2560x1440:
./launch_video_pipeline.sh tevs-ar0521-2 2560x1440
Preview Result


